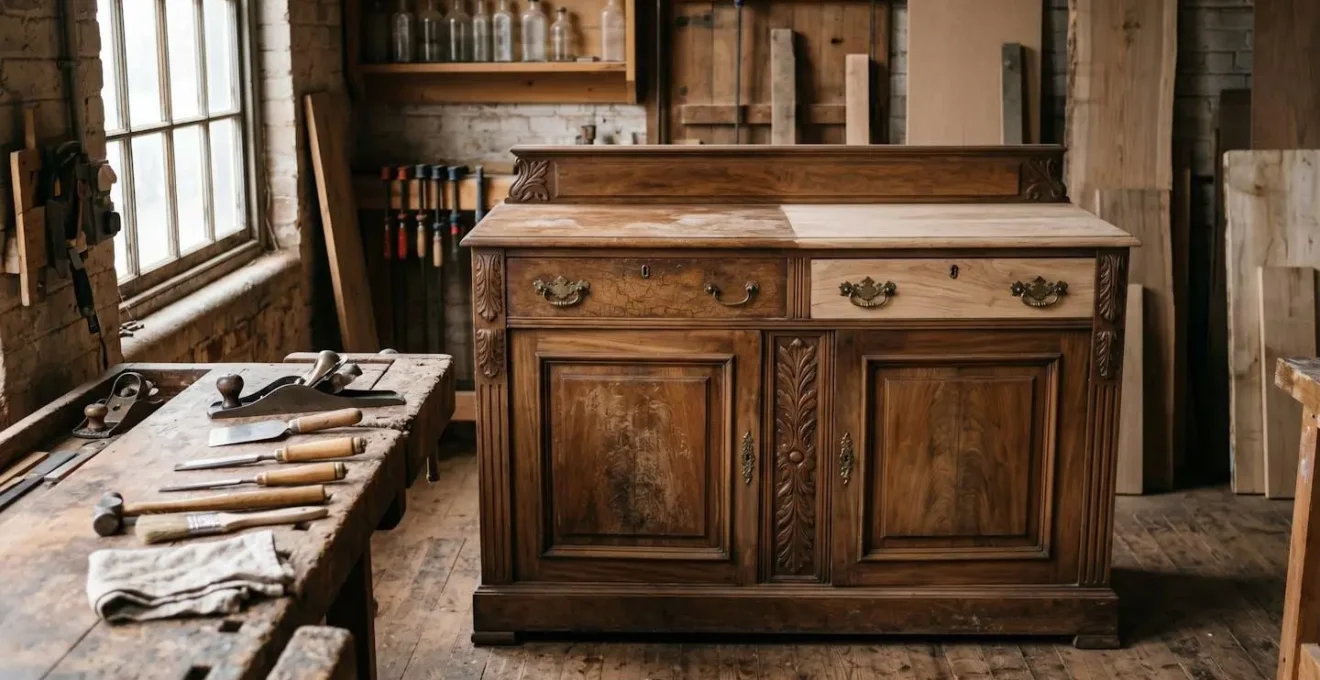
That inherited sideboard has immense sentimental value, but its dated look clashes with your modern home. The solution isn’t to cover its history with paint, but to make informed choices that honour its past while updating its function.
- Prioritise assessing structural integrity and understanding existing finishes before attempting any cosmetic changes.
- Favour reversible upgrades and durable, repairable finishes over quick, trendy fixes that devalue the piece.
Recommendation: Your restoration journey should begin with a careful diagnosis of the piece’s joints and surface—this is the foundation for a successful and respectful transformation.
That Victorian sideboard you inherited from your grandmother is a paradox. It holds a universe of sentimental value, but its dark, heavy presence feels out of step with your contemporary UK home. The internet is full of advice, most of it falling into two camps: the aggressive « strip it, sand it, paint it » approach that erases all history, or the purist « don’t touch it » mantra that leaves you with a piece you can’t live with. This common advice often suggests a full-on battle with the piece, using power sanders and thick, irreversible paints.
But what if the key wasn’t to wage war on the furniture, but to enter into a dialogue with it? The true art of restoration lies not in brute force, but in understanding the story the piece tells through its wear, its construction, and its original materials. It’s about making informed, respectful choices that preserve its soul while adapting it for the next hundred years of its life. This isn’t just about refinishing wood; it’s about becoming the next caring custodian of a family heirloom.
This guide is designed to shift your mindset from a DIYer to a conservator. We will explore how to diagnose hidden issues, choose the right modern upgrades that respect the original structure, select a finish that is both beautiful and durable, and learn the fundamental skills needed to ensure your treasured piece not only looks good, but is structurally sound for generations to come. We will focus on the ‘why’ behind each step, empowering you to make the best decisions for your specific piece of furniture.
This article provides a comprehensive overview of the key decisions you’ll face. The following summary outlines the specific topics we will cover, from assessing the original finish to learning the foundational skills of joinery repair.
Summary: A Restorer’s Guide to Honouring and Updating Antique Furniture
- Why Does Stripping Shellac Reveal Hidden Damage Beneath Your Antique Table?
- How to Add Soft-Close Hinges to a 1920s Cabinet Without Drilling New Holes?
- Chalk Paint or Oil-Based Lacquer: Which Finish Lasts Longer on High-Use Furniture?
- The Sanding Mistake That Ruins 1 in 3 Veneered Antiques During DIY Restoration
- When Is the Best Season to Strip and Refinish Wooden Furniture in the UK?
- When Is the Best Season to Buy Antique Furniture With Stable Joints in the UK?
- Why Should Your First £150 Tool Budget Go to a Quality Drill, Not a Table Saw?
- How to Learn Basic Joinery Skills in 30 Days Using Free UK Resources?
Why Does Stripping Shellac Reveal Hidden Damage Beneath Your Antique Table?
Often, the first instinct is to strip an old, crazed finish. But that finish is not just a coating; it’s a historical document. When you strip away old shellac, you’re not just removing varnish; you’re often revealing a catalogue of past traumas the piece has endured. Shellac is a porous, natural resin, and over decades it absorbs evidence of its life. Spilled drinks, leaking plant pots, and the use of modern spray polishes can all leave their mark not just on the surface, but within the finish itself. As experts in the field note, the primary culprit for finish failure is often well-intentioned but improper care.
Inappropriate cleansers and polishers would be the number one cause of damage to traditional varnishes.
– MPF Conservation, S is for Shellac Varnish Damage: A-to-Z Challenge
Before you reach for the stripper, you must learn to read the patterns of damage. A cloudy white ring is water that has been absorbed into the shellac layer, which can often be repaired without stripping. An « alligatoring » or crackled pattern might indicate exposure to ammonia or extreme heat, which requires a different approach. Dark stains that penetrate deeply could be from oil or silicone-based products that have seeped through cracks in the finish and contaminated the wood below. By diagnosing the issue first, you might find that a less invasive process called « re-amalgamation, » using denatured alcohol to re-flow the existing shellac, can repair the finish while preserving the precious patina underneath.
Understanding these signs transforms your role from a stripper to a detective. Here is a quick diagnostic guide to help you interpret what your furniture is trying to tell you:
- Alligatoring (crackle pattern): Indicates exposure to ammonia-based cleaners or extreme temperature changes. Consider re-melting the shellac with denatured alcohol instead of stripping.
- Cloudy white rings: Water damage absorbed into the finish. These can often be repaired by re-amalgamating the shellac layer with alcohol.
- Dark penetrating stains: Oil or silicone contamination that has seeped through cracks. This requires targeted treatment before any new finish is applied.
- Peeling at edges: A sign of moisture intrusion or an incompatible previous finish applied over the shellac. You must inspect the wood substrate before proceeding.
This diagnostic approach is the core of conservation. It ensures you don’t use a destructive solution for a problem that could have been solved with a gentle, targeted repair, preserving the authentic history of the piece.
How to Add Soft-Close Hinges to a 1920s Cabinet Without Drilling New Holes?
One of the most satisfying ways to bridge the gap between a historic piece and modern life is by improving its daily function. The jarring slam of an old cabinet door is a constant reminder of its age. The desire for the smooth, silent action of soft-close hinges is understandable, but the thought of drilling large, new holes into a 100-year-old cabinet is horrifying. It’s a classic conflict between function and form, but thankfully, it’s one with a clever, non-invasive solution.
The key is to avoid replacing the original hinges altogether. Those hinges are part of the piece’s story and construction. Instead, the most respectful and reversible method is to install a universal soft-close damper adapter. These small, ingenious devices work alongside your existing hinges, catching the door in the last few inches of its travel and guiding it to a silent close. They typically attach to the cabinet frame with a single, small screw, often hidden from view.
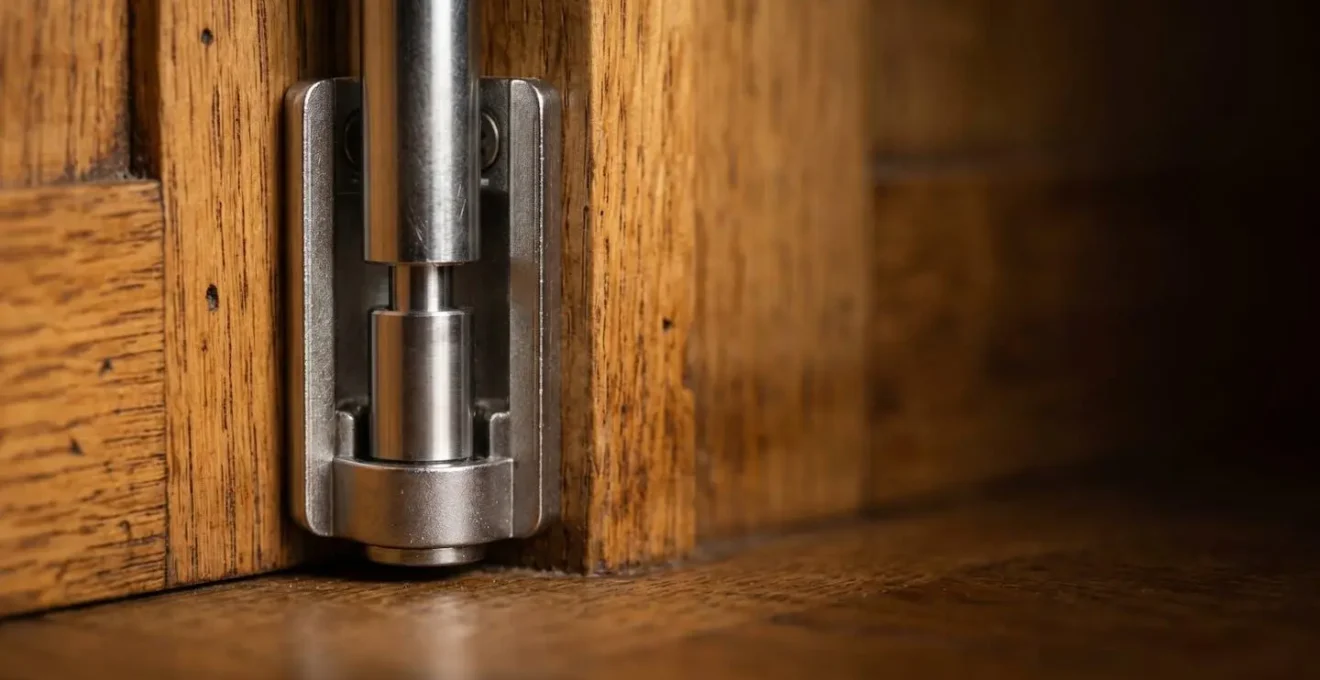
As you can see, this approach adds modern functionality without altering the historical integrity of the furniture. The original hardware remains untouched, and the intervention is completely reversible—a core principle of good conservation. If a future owner wishes to return the piece to its original state, they can simply unscrew the adapter, leaving almost no trace. This method allows the piece to evolve without being fundamentally damaged.
When considering an upgrade, always think in terms of invasiveness. Here are the common methods, ranked from least to most invasive:
- Level 1 (Non-Invasive): Install universal soft-close damper adapters. These clip-on devices attach to the cabinet frame with a single screw and are compatible with any existing hinge type. They are fully reversible.
- Level 2 (Minimal): Replace only the hinge cup while keeping the original mounting plates. This requires matching the overlay measurements but uses existing screw holes.
- Level 3 (Moderate): Install modern concealed hinges in existing 35mm cup holes. This might require deepening the holes by a few millimetres.
- Level 4 (Advanced): Create custom adapter plates from matching wood. This involves milling thin spacers that fit the original mortise and house the new hardware, preserving the antique substrate entirely.
By opting for a damper, you get the modern convenience you crave while honouring the craftsmanship of the past—a perfect compromise.
Chalk Paint or Oil-Based Lacquer: Which Finish Lasts Longer on High-Use Furniture?
The question of finish is where many well-intentioned restorations go astray. Chalk paint has been marketed as the ultimate beginner-friendly solution, promising a quick transformation with minimal prep. While it has its place for decorative, low-traffic items, applying it to a high-use piece like a sideboard can be a mistake. Chalk paint is inherently soft and porous, relying on a topcoat of wax for protection. This wax is not very durable; it’s susceptible to water stains and requires regular re-application. Furthermore, repairing a damaged waxed finish is difficult, often requiring the entire surface to be stripped.
An oil-based lacquer or a modern hardwax oil offers vastly superior durability for a piece that will see daily use. A sprayed oil-based lacquer creates a hard, chip-resistant film that can provide a stunning high-gloss finish, completely transforming the piece into a contemporary statement. A hardwax oil, on the other hand, penetrates the wood fibres, creating a durable, satin finish that feels more natural and is incredibly easy to repair. A small scuff or scratch can often be buffed out and a new drop of oil applied in minutes, a process impossible with a chalk paint and wax system. It’s crucial to note that any finish requires adequate curing time to reach maximum durability; chalk paint needs a full 2-3 weeks to cure, a period during which it is especially vulnerable.
The choice of finish is a long-term commitment. Before you pick up a brush, you must consider the piece’s function and how much maintenance you are willing to perform. This comparative table breaks down the key differences for a high-use antique.
| Finish Type | Durability Rating | Repair Ease | Maintenance Frequency | Best Use Case |
|---|---|---|---|---|
| Chalk Paint + Wax | Moderate (requires rewaxing every 3 years) | Difficult (wax must be stripped for repairs) | High (vulnerable to water stains) | Low-traffic decorative pieces |
| Oil-Based Lacquer | Excellent (chip-resistant hard finish) | Moderate (localized repairs possible) | Low (maintains gloss for years) | High-gloss modern conversions |
| Hardwax Oil (Rubio/Osmo) | Very Good (penetrates wood fibers) | Excellent (scuffs buffed in 5 minutes) | Very Low (spot-repairable) | Heirloom pieces with natural aesthetic |
| Dewaxed Shellac | Good (reversible, authentic to period) | Excellent (re-amalgamates with alcohol) | Low (periodic re-coating) | Value-preserving antique restoration |
Ultimately, choosing a finish based on longevity and ease of repair, rather than just initial ease of application, is a hallmark of a thoughtful restoration that is built to last.
The Sanding Mistake That Ruins 1 in 3 Veneered Antiques During DIY Restoration
This is the moment that makes restorers’ hearts stop: you’re sanding an old, dark finish, and suddenly a pale, ugly patch appears. You’ve sanded right through the thin layer of decorative wood veneer and exposed the cheaper substrate wood beneath. This is, by far, the most common and devastating mistake in DIY antique restoration. The culprit is almost always an over-enthusiastic use of an electric sander. What many people don’t realise is that the construction of antique furniture is different from modern pieces. According to research from antique furniture restoration specialists, Victorian-era veneer was often between 1/16-inch to 1/20-inch thick, which, while thicker than today’s paper-thin 1/40-inch veneer, is still incredibly easy to burn through with a power tool in a matter of seconds.
The number one rule of working with veneered antiques is to put the power sander away. A far safer and more controlled method for removing an old finish from veneer is to use a chemical stripper and a card scraper. A card scraper is a simple, flat piece of steel that, when sharpened correctly, shaves off whisper-thin layers of finish and wood without the aggressive, gouging action of sandpaper. This tool gives you tactile feedback and control that is impossible to achieve with a machine, dramatically reducing the risk of a catastrophic sand-through.
But what if the worst has already happened? Don’t panic. While a large sand-through is a serious problem, small areas can often be camouflaged. The key is to stop sanding immediately and assess the damage. Here is a triage protocol for dealing with a veneer burn-through:
- Immediate Stop Protocol: Cease all sanding the moment substrate colour appears. Continued sanding will only enlarge the damaged area and complicate the repair.
- Minor Burn-Through (pencil-tip size): Apply a grain-matched wood stain marker directly to the exposed substrate, then seal with your chosen finish to blend it in.
- Moderate Damage (quarter-size): Use artist’s brushes with acrylic paint mixed to match the surrounding wood tones. Build up the grain pattern in layers, starting with the darkest base colour.
- Major Failure (multiple areas): This requires cutting and installing a matching veneer patch. Use a sharp craft knife to create irregular ‘puzzle piece’ edges, which hide the seams much better than straight geometric cuts.
- Prevention Strategy: Always use card scrapers instead of sanders on veneer. To gauge removal depth when you must sand, lightly cover the surface with pencil marks and sand only until the marks disappear.
This single piece of knowledge—the danger of sanding veneer—separates a careful restorer from a destructive amateur. It’s a lesson best learned through reading rather than heartbreaking experience.
When Is the Best Season to Strip and Refinish Wooden Furniture in the UK?
The success of your refinishing project can be determined before you even open a can of varnish, and it has everything to do with the notoriously fickle British weather. Wood is a hygroscopic material, meaning it absorbs and releases moisture from the air, causing it to swell and shrink. Finishes, too, are highly sensitive to their application environment. Attempting to strip and refinish furniture in a damp, cold garage in November is a recipe for disaster. The ideal conditions are a stable temperature and, most importantly, moderate humidity. High humidity can cause a ‘blush’ in shellac and lacquer—a milky white clouding as moisture gets trapped under the finish. It can also dramatically extend the drying time of oil-based products, leaving them tacky for days.
Conversely, working in excessively dry conditions can cause finishes to dry too quickly, leading to brush marks and poor levelling. For a flawless, durable finish, you need a « Goldilocks » environment. For most finishes, the sweet spot for application is a temperature between 15-25°C and a relative humidity below 65%. In the UK, this generally means that the late spring and early autumn are the optimal seasons for refinishing work. The summer can be too humid, and the winter is too cold and damp. Investing in a simple digital hygrometer (a device that measures humidity) is one ofthe best small investments you can make. As a rule, professional restoration studios maintain a 40-60% relative humidity level to ensure consistent results.
Different products have different tolerances, so it’s always crucial to read the manufacturer’s instructions. However, this general guide outlines the ideal conditions and potential risks.
| Finish Type | Ideal Temperature | Ideal Humidity | High Humidity Risk | Low Humidity Risk |
|---|---|---|---|---|
| Shellac | 60-80°F (15-27°C) | Below 50% | Blushing (cloudy white finish) | Fast evaporation causing lap marks |
| Oil-Based Varnish | 65-75°F (18-24°C) | 40-60% | Extended tacky period (days not hours) | Surface skinning before penetration |
| Water-Based Poly | 50-85°F (10-29°C) | 40-70% | Slow curing, potential mildew | Rapid drying causing poor leveling |
| Hardwax Oil | 60-75°F (15-24°C) | 35-65% | Delayed cure, sticky surface | Inadequate penetration depth |
Patience is a restorer’s greatest virtue, and this includes waiting for the right environmental conditions. It will pay dividends in the quality and longevity of your finish.
When Is the Best Season to Buy Antique Furniture With Stable Joints in the UK?
Just as the seasons affect the refinishing process, they also have a profound impact on the structural integrity of wooden furniture. The same swelling and shrinking that affects finishes also works on the joints. During the damp, high-humidity months of a UK winter, wood swells, which can make a loose joint feel deceptively tight. Conversely, in the drier air of a centrally heated home in winter or during a dry summer spell, the wood shrinks, revealing the true state of the joints as gaps open up and the piece begins to wobble. This seasonal movement is the enemy of old, brittle glue.
Therefore, the best time to assess the true structural health of a piece of antique furniture is during a period of low humidity, typically in late summer or early autumn after a dry spell, or after a piece has been in a dry, heated indoor environment for several weeks. This is when the wood is at its most contracted, and any weaknesses in the joinery will be most apparent. A chair that feels solid in a damp antique shop in February might reveal itself to be a wobbly mess in your dry living room in August. Buying during a dry period gives you the most honest assessment of the work that lies ahead.
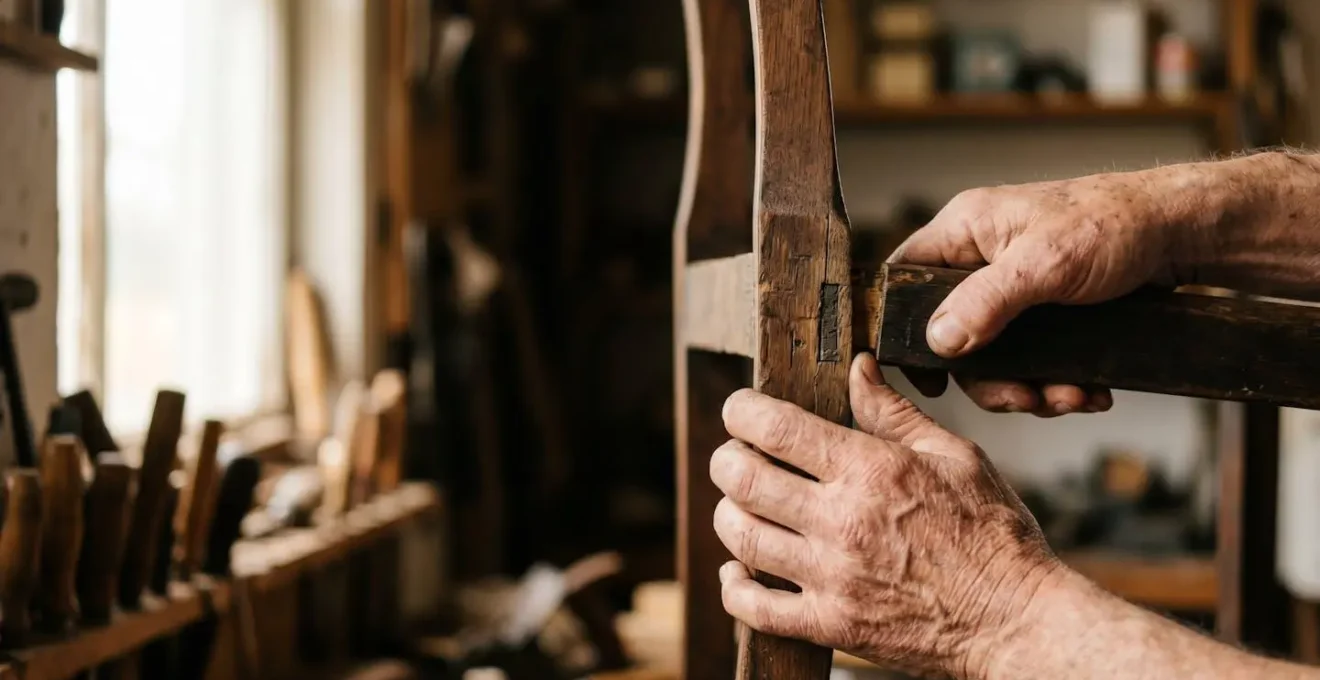
Regardless of when you buy, the first thing you should do is perform a three-point diagnostic check on the main joints. This hands-on assessment is the most important step in evaluating a piece. It’s about feeling and listening to what the furniture is telling you about its hidden structure.
- The Wiggle Test: Apply gentle, firm pressure perpendicular to each joint corner. A healthy joint will feel completely solid with zero movement. Any visible gap opening, creaking, or rocking indicates glue failure.
- The Sound Test: Lightly tap the area around a joint with your knuckle. A solid ‘thunk’ sound means the glue bond is intact. A hollow, rattling, or buzzing sound reveals that the tenon is loose inside its mortise.
- Seasonal Movement Assessment: Examine the gaps at the joints. Gaps that open and close by 1-2mm with the seasons indicate normal wood movement. Gaps that are consistently wide signal a structural failure that requires complete re-gluing.
- Hide Glue Verification: Check if the original joints used hide glue by applying a drop of warm water to a small, hidden test area. Hide glue will soften and become tacky. Modern PVA or epoxy glues will remain unaffected and indicate a past, often inappropriate, repair.
Cosmetic issues can almost always be fixed, but a piece with catastrophic joint failure requires a complete and labour-intensive rebuild. Always prioritise structural integrity over surface appearance.
Why Should Your First £150 Tool Budget Go to a Quality Drill, Not a Table Saw?
There’s a significant difference between making furniture from scratch and restoring it. Furniture making is about cutting and shaping new wood, which requires tools like table saws and planers. Antique restoration, however, is primarily about careful disassembly, cleaning, and repair. Your first and most frequent tasks will not be cutting large boards, but removing ancient screws, cleaning 100-year-old glue from joints, and delicately reassembling the piece. For this, a table saw is not only unnecessary, it’s counterproductive. The most important power tool in a restorer’s kit is a high-quality, variable-speed drill with good torque control.
The Restorer’s Starter Kit: Hand Tools Over Power Tools
The approach of professional conservators like The Fine Art Restoration Company is a masterclass in this philosophy. They prioritise traditional hand-tool methods specifically because power tools can so easily destroy historical character. Their standard protocol uses card scrapers for finish removal on delicate veneer (which eliminates the risk of sand-through), block planes for precise wood removal without tear-out, and traditional hide glue for strong but reversible repairs. This toolkit follows the primary rule of conservation: ‘do no harm’. When power tools are deemed necessary, they specify a variable-speed drill for the delicate task of removing historic hardware. Its controlled torque can back out a fragile brass screw without stripping the head or damaging the surrounding wood—a task that is often impossible with hand drivers alone.
A good drill allows you to control the speed and power needed to coax out a stubborn screw without damaging the delicate slot. It’s also essential for tasks like drilling precise pilot holes for new screws or using small wire brushes to clean grime from detailed carvings. In restoration, finesse and control are far more valuable than raw power. The rest of your initial budget should be spent on high-quality hand tools that are the true workhorses of restoration: a set of card scrapers, a good quality block plane for fitting joints, a sharpening system for your tools, and a small pot and brush for traditional hide glue.
This table illustrates the fundamental difference in tool priorities between making and restoring furniture.
| Task Priority | Furniture Making | Antique Restoration |
|---|---|---|
| Primary Activity | Cutting new joints, milling lumber | Disassembly, cleaning, re-gluing existing joints |
| Essential Power Tool | Table saw for ripping boards | Variable-speed drill for hardware removal |
| Finish Removal | Not applicable (new wood) | Card scraper, cabinet scraper (hand tools) |
| Surface Preparation | Orbital sander, thickness planer | Block plane, scraper plane (controlled removal) |
| Joinery Repair | Router, biscuit joiner for new joints | Hide glue, clamps, glue brushes |
| First £150 Investment | Combination square, quality saw, chisels | Card scraper set, block plane, sharpening system, hide glue |
By investing in the right tools for the job, you equip yourself for a successful and respectful restoration, avoiding the costly and destructive path of using woodworking tools for a conservator’s task.
Key takeaways
- Assess, Don’t Guess: Before any action, learn to ‘read’ the furniture by diagnosing its finish, structure, and materials. This informs every subsequent decision.
- Structure Before Surface: The integrity of the joints is paramount. A beautiful finish on a wobbly piece is a failed restoration. Prioritise structural repairs first.
- Reversibility is Respect: Choose methods and materials (like soft-close adapters and hide glue) that can be undone by a future generation. This honours the piece’s long life.
How to Learn Basic Joinery Skills in 30 Days Using Free UK Resources?
Reading about joinery is one thing; doing it is another. The single most valuable skill you can learn to give an antique a new lease on life is how to properly re-glue a failed joint. It is the foundation of all restoration. Fortunately, this is a skill you can learn for free, using the wealth of knowledge shared by master craftspeople online and by practicing on inexpensive ‘sacrificial’ pieces from UK charity shops. The key is a methodical approach, focusing on one small step at a time. You don’t need a fancy workshop; you need a small, clear space and the patience to follow the process.
The goal isn’t to become a master cabinetmaker in a month. The goal is to confidently and correctly re-glue a single mortise-and-tenon joint using traditional, reversible hide glue. This glue is the secret of the professionals. Unlike modern PVA (white) glue, which creates a permanent plastic barrier, hide glue is incredibly strong but remains reversible with heat and moisture. This means your repair can be undone by a future restorer, adhering to the « do no harm » principle. Mastering this one process will give you the confidence to tackle 90% of the structural problems you’ll encounter in antique furniture.
This 30-day challenge breaks down the process into manageable weekly goals. It’s a practical, hands-on curriculum for the aspiring home restorer. Your first step is to find a small, wobbly piece of furniture for a few pounds that you don’t mind experimenting on.
Action Plan: The 30-Day Antique Joinery Repair Challenge
- Week 1—Regluing Fundamentals: Source a practice piece from a charity shop. Carefully disassemble one loose mortise-and-tenon joint. Clean out the old, failed glue from the joint using warm water and a soft brush. Your primary task this week is to study the preparation of hide glue: learn the ideal 192°F (89°C) bath temperature and aim for a liquid honey consistency.
- Week 2—Hide Glue Mastery: Mix a fresh, small batch of hide glue each day to get a feel for its consistency. Practice the hot application with a natural bristle brush. Focus on understanding its open time (the 5-7 minutes you have to work) and its tack time. Internalise the principle of reversibility.
- Week 3—Clamping Without Damage: Master the art of clamping. Learn to use pads (small wood offcuts) to distribute pressure and protect the wood surface. Use waxed paper between the pads and your joint to prevent any glue squeeze-out from adhering. Your goal is uniform pressure across the entire joint.
- Week 4—Reassembly and Verification: Reassemble your practice joint using all the techniques you’ve learned. Perform the ‘wiggle test’ and ‘sound test’ to verify the joint is now solid. Document your before-and-after results, and then begin on a second practice joint to reinforce your skills and build true confidence.
This journey transforms you from someone who owns an old piece of furniture into the person who saved it. By investing a little time to learn the right way, you can ensure your family heirloom will be strong, stable, and cherished for many more decades to come.