DIY & Crafts
Taking on DIY projects around the home can feel simultaneously empowering and overwhelming. Whether you’re drawn to breathing new life into a tired piece of furniture, mastering traditional building techniques that have stood the test of centuries, or undertaking strategic renovations that increase both functionality and value, the world of home crafts demands equal parts enthusiasm and knowledge. The difference between a successful transformation and a costly mistake often lies not in expensive tools or professional training, but in understanding the fundamental principles that govern each craft.
This comprehensive resource brings together the core knowledge areas that underpin confident DIY work in the home and decoration space. From the chemical behaviour of historic finishes to the structural considerations of upcycled pieces, from the patient science of lime curing to the financial realities of renovation ROI, we’ll explore the essential concepts that turn ambitious ideas into accomplished projects. Whether you’re planning your first venture into furniture restoration or seeking to expand your existing skillset, the foundations covered here will help you approach each project with clarity and realistic expectations.
Restoring and Upcycling Vintage Furniture
Vintage furniture restoration sits at the intersection of preservation and practicality. Unlike modern flat-pack pieces designed for a single lifecycle, older furniture was built to last generations—but only if treated with an understanding of its original construction methods and materials.
Understanding Period Finishes and Materials
The finish on antique and vintage furniture tells a story about both its era and its journey through time. Shellac, widely used before the mid-twentieth century, creates a warm amber glow but remains vulnerable to water and alcohol. When you strip shellac, you often reveal previous repairs, wood colour variations, or structural damage that the finish had been masking—not because of deception, but simply because furniture accumulates history. Oil-based lacquers and traditional wax finishes each respond differently to stripping agents, heat, and humidity.
Modern alternatives like chalk paint offer ease of application and a fashionable aesthetic, but they fundamentally change the relationship between wood and environment. Traditional oil-based finishes penetrate and seal the timber, offering durability on high-use surfaces like tabletops and cabinet doors. The choice between finishes shouldn’t be purely aesthetic; it needs to account for how the piece will actually be used in daily life.
Common Pitfalls in Furniture Restoration
One of the most frequent restoration mistakes involves sanding through veneer—a thin layer of decorative wood applied over a structural base. Veneer on quality antiques can be less than 1mm thick, and aggressive sanding removes not just the finish but the decorative timber itself, exposing plywood or cheaper wood beneath. This single error accounts for a significant proportion of irreversibly damaged pieces during DIY restoration.
Another critical consideration, particularly with pre-war furniture, is lead-based paint. Regulations varied historically, and many cabinets, especially those painted in institutional or rental settings, carry lead paint layers. Sanding these without proper testing and precautions creates toxic dust that contaminates your workspace and poses serious health risks. Testing kits are inexpensive and essential before beginning any stripping or sanding work on painted furniture of uncertain age.
Modernising Without Losing Character
The appeal of vintage furniture often lies in its character—the patina, the joinery, the proportions—yet functionality matters in a contemporary home. Adding soft-close hinges to a 1920s cabinet enhances daily usability, but drilling new holes through original framework can weaken joints and devalue the piece. The solution lies in adaptive hardware that works with existing holes or non-invasive mounting techniques.
Similarly, converting period storage pieces like larder cupboards into modern pantries requires balancing ventilation needs with aesthetic integrity. Solid-door pantries trap moisture and odours, but cutting ventilation grilles into original panels destroys their value. Strategic approaches include:
- Installing discreet vents in side panels or plinths rather than visible door faces
- Using the gap between door and frame with brush strips to allow airflow
- Selecting hardware finishes—period brass versus modern brushed nickel—that complement rather than clash with the piece’s era
When upcycling lightweight vintage dressers for kitchen storage, the structural question becomes paramount. Pieces designed to hold linens may sag under the concentrated weight of modern crockery. Reinforcing shelves and inspecting joint integrity before repurposing prevents disappointing failures after you’ve invested time in refinishing.
Working With Traditional Lime Plaster
Lime plaster represents one of the oldest continuous building traditions, particularly relevant for anyone working with period properties or seeking breathable, humidity-regulating wall finishes. Yet its behaviour differs fundamentally from modern gypsum products, and those differences catch out many enthusiastic DIYers.
Why Lime Takes Time to Cure
While gypsum plaster sets through hydration in a matter of hours, lime plaster cures through carbonation—a chemical reaction with carbon dioxide in the air that gradually converts soft lime putty back into limestone. This process takes several weeks rather than overnight, with full cure requiring optimal conditions of temperature, humidity, and air circulation.
This extended cure time isn’t a flaw but a feature. The slow set allows lime to accommodate minor movement in older buildings without cracking, and creates a breathable surface that allows moisture to pass through rather than becoming trapped behind an impermeable barrier. In damp stone cottages, this breathability is precisely what prevents the trapped moisture and subsequent decay that modern cement renders can cause.
Choosing the Right Hydraulic Lime Grade
Not all lime plasters are identical. Natural Hydraulic Lime (NHL) comes in grades—NHL 2, NHL 3.5, and NHL 5—with numbers indicating compressive strength. The choice depends on exposure and substrate:
- NHL 2 is softer and more breathable, suited to internal walls in sheltered conditions or very soft stone that needs a sympathetic mortar
- NHL 3.5 offers the middle ground for most internal plastering and external work in moderate exposure
- NHL 5 provides greater strength for high-exposure locations, chimneys, or harder stone backgrounds
Choosing too strong a lime for soft stone creates stress points where the harder mortar damages weaker masonry. Choosing too weak a mix for high exposure leads to erosion and failure. The matching principle—lime should be slightly weaker than the material it’s protecting—guides appropriate selection.
Timing your lime plastering project matters significantly. Attempting lime work in winter risks frost damage before carbonation completes. Fresh lime contains moisture, and if that freezes before the set progresses, the expanding ice crystals disrupt the matrix, causing crumbling and failure. Starting projects in late spring through early autumn provides the stable temperatures lime needs. Additionally, artificial heating to speed drying is counterproductive—rapid drying prevents proper carbonation and causes cracking in a high proportion of rushed winter projects.
DIY Renovations That Impact Home Value
Not all DIY improvements deliver equal returns. Some projects add significant value, others merely prevent loss, and a surprising number can actually reduce what buyers are willing to pay. Understanding these dynamics before you start saves both money and disappointment.
Understanding ROI Before You Start
In terraced housing, which represents a substantial portion of the housing stock in many areas, certain improvements consistently add value. Loft conversions that add usable bedroom space typically command strong returns, particularly in areas where per-square-metre prices are high. However, the value added varies dramatically by location—a loft conversion in a high-demand urban area may add considerably more per square metre than a garage conversion, while in suburban markets with ample ground-level space, the calculation reverses.
Kitchen improvements occupy a complex middle ground. A tired, dysfunctional kitchen depresses value and deters buyers, so renovation to a good standard recovers what would otherwise be lost. However, over-specifying the kitchen—installing professional-grade appliances, bespoke cabinetry, or luxury finishes that far exceed neighbourhood norms—rarely returns the investment. In a street where properties typically sell around a certain price point, buyers aren’t willing to pay a premium for specifications they didn’t request and may not value.
The timing of renovations relative to sale also matters. Completing work several months before listing allows the home to feel settled rather than mid-construction, gives you time to address any issues that emerge, and lets you live with the improvements long enough to honestly discuss them with potential buyers. Rushing renovations immediately before sale often shows in the finish quality.
Navigating Building Regulations
DIY work that requires building regulations approval—structural changes, electrical work beyond simple additions, new bathrooms, extensions—carries obligations even if you do the work yourself. The regulations exist to ensure safety and proper construction standards, and retrospective approval for work completed without required permissions can be complex, expensive, and sometimes impossible if the work isn’t accessible for inspection.
For loft conversions completed without approval, obtaining retrospective sign-off requires demonstrating compliance, which may necessitate opening up finished work for inspection or commissioning structural calculations to prove adequacy. The uncertainty this creates can affect saleability, with mortgage lenders sometimes refusing to lend on properties with unregularised work. Beginning any significant project with proper permissions, even when doing the work yourself, protects both safety and future value.
Building Your DIY Skillset From Scratch
Enthusiasm for DIY projects often outpaces practical skill, leading to expensive material waste and abandoned half-finished work. A strategic approach to skill development transforms that enthusiasm into genuine capability.
The Right Learning Sequence
Craft skills build on each other in a logical progression. Measuring accurately underpins everything else—if your measurements are wrong, even perfect cutting and joining produces pieces that don’t fit. From measuring flows cutting, where you learn to account for blade width (kerf) and grain direction. Joining techniques come next, requiring understanding of how different materials respond to screws, nails, glues, and mechanical joints. Finishing—whether paint, stain, oil, or wax—should be learned last, as it reveals and either conceals or emphasises the quality of everything that came before.
Attempting to learn these skills in reverse order, or all simultaneously on an ambitious first project, frequently leads to the pattern where £200 in materials gets wasted before basic competencies develop. Starting with small, low-stakes projects—a simple shelf, a basic box—allows you to practice measuring, cutting, and joining on inexpensive materials where mistakes are learning opportunities rather than expensive failures.
Smart Tool Investment for Beginners
The temptation to accumulate tools often exceeds immediate needs. A quality drill—both for drilling holes and driving screws—sees use in nearly every project and justifies investing a meaningful portion of an initial tool budget. A table saw, by contrast, is expensive, requires space, and remains unnecessary for most beginner projects that can be accomplished with hand tools or a basic circular saw.
Access models are expanding beyond outright purchase. Maker spaces—communal workshops where members pay monthly fees for access to professional equipment, workspace, and often informal mentoring—have become increasingly available in urban areas. For the cost of a single power tool, monthly membership provides access to a full workshop, helping you determine which tools you actually use frequently enough to justify purchasing before committing to expensive equipment.
The debate between learning methods—YouTube tutorials versus hands-on weekend workshops—ultimately depends on learning style and skill type. YouTube excels for visual processes you can pause and replay, making it effective for techniques like finishing or seeing how joints go together. Workshops provide irreplaceable value for skills requiring tactile feedback—how tight to pull upholstery fabric, how much pressure to apply when planing, the feel of proper sanding progression. For complex crafts like upholstery, combining both approaches typically produces faster competency than either alone.
The journey from interested beginner to confident DIY practitioner isn’t about accumulating tools or watching endless tutorials. It’s about understanding materials, respecting processes, and building skills in a logical sequence that allows each project to consolidate learning while producing something genuinely useful. Whether your interest lies in rescuing forgotten furniture, maintaining a period property with appropriate techniques, strategically improving your home’s value, or simply developing satisfying practical skills, success stems from the same foundation: informed patience, realistic scope, and willingness to learn from each attempt.

How to Learn Basic Joinery Skills in 30 Days Using Free UK Resources?
In summary: Focus your initial budget on a versatile cordless drill, not a large, single-purpose tool like a table saw. Leverage UK-based maker spaces and reclaimed materials to minimize costs and accelerate hands-on learning. Adopt the « Micro-Project Loop »: build small,…
Lire la suite
Which DIY Renovations Add the Most Value to a UK Terraced House?
The greatest return on investment for a UK terraced house comes not from the most expensive renovation, but the one most proportional to your property’s ‘value ceiling’. Major additions like loft conversions add significant value only when fully compliant with…
Lire la suite
How to Apply Lime Plaster in a Damp Stone Cottage Without It Crumbling?
Applying lime plaster to a damp stone cottage fails not because of the plaster, but because of a misunderstanding of its purpose: it is a moisture management system, not a simple wall covering. Success depends on controlling the environment (temperature,…
Lire la suite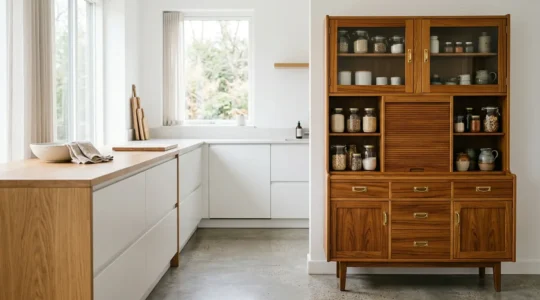
How to Convert a 1950s Larder Cupboard Into a Functional Pantry for Today?
In summary: A successful 1950s larder conversion is an engineering project, not just a cosmetic makeover. Prioritise structural reinforcement to handle the weight of modern kitchenware before any aesthetic work. Always test for lead paint before sanding; use chemical stripping…
Lire la suite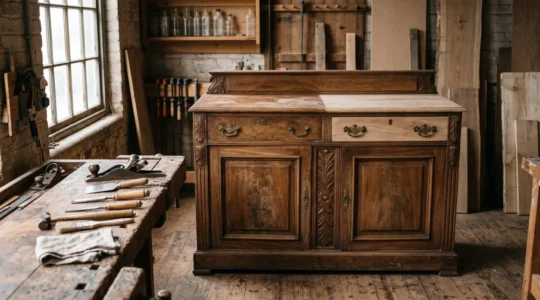
How to Restore a Victorian Sideboard Without Erasing Its Original Character?
That inherited sideboard has immense sentimental value, but its dated look clashes with your modern home. The solution isn’t to cover its history with paint, but to make informed choices that honour its past while updating its function. Prioritise assessing…
Lire la suite