In summary:
- A successful 1950s larder conversion is an engineering project, not just a cosmetic makeover.
- Prioritise structural reinforcement to handle the weight of modern kitchenware before any aesthetic work.
- Always test for lead paint before sanding; use chemical stripping or encapsulation for safety.
- Preserve the unit’s soul by choosing period-appropriate hardware and ventilation solutions.
- Follow a strict order of operations: reinforce, strip, modify, prime, then paint.
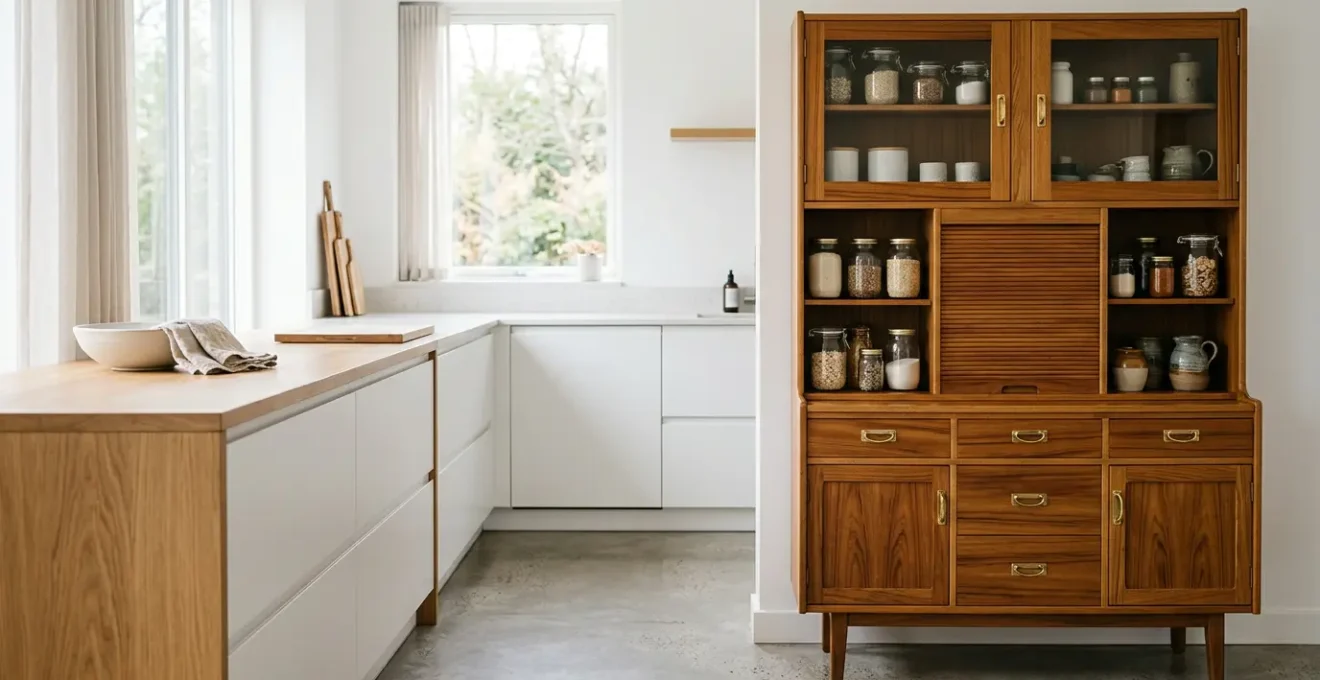
There’s a unique magic in finding a 1950s larder cupboard. You can almost smell the freshly baked bread and see the neat rows of preserves. Its solid wood and charming design whisper tales of a bygone era, and the immediate impulse for any retro-loving homeowner is to bring it into a modern kitchen. The common advice is often deceptively simple: a quick sand, a fashionable coat of chalk paint, and some new handles. But this approach often leads to disappointment when sagging shelves, musty smells, and chipped paint reveal a deeper problem.
The truth is, these mid-century workhorses weren’t built for the demands of a 21st-century kitchen. They were not designed to hold heavy stacks of stoneware plates or the bulk-buy items from a modern supermarket. To truly honour this piece of history and make it functional for today, we must look beyond the surface. The key isn’t in the colour of the paint, but in understanding the structural integrity, the hidden material risks, and the period authenticity of the piece. This requires a shift in mindset from simple decorator to careful restoration specialist.
This guide will walk you through the correct order of operations for a successful conversion. We’ll explore the science behind why old shelves sag, how to introduce ventilation without spoiling the look, and how to make informed choices that respect the past while preparing your larder for a long and useful future. It’s about creating a piece that is not only beautiful but also safe, durable, and truly functional.
To navigate this restoration journey, we’ve structured this guide to address the most critical questions you’ll face. From structural assessments to the final finishing touches, here is the blueprint for a perfect larder conversion.
Summary: A Guide to Converting Your 1950s Larder Cupboard
- Why Does Your Upcycled Dresser Sag Under the Weight of Modern Crockery?
- How to Retrofit Ventilation Into a Solid-Door Pantry Without Ruining Its Look?
- Period Brass or Modern Brushed Nickel: Which Hardware Suits a Mid-Century Unit Best?
- The Hidden Lead Paint Risk That Makes 40% of Pre-War Cabinets Unsafe to Sand
- In What Order Should You Strip, Reinforce and Repaint a Vintage Kitchen Dresser?
- The Hardware Markup Mistake That Adds 30% to Your Custom Kitchen Bill
- The Sanding Mistake That Ruins 1 in 3 Veneered Antiques During DIY Restoration
- How to Restore a Victorian Sideboard Without Erasing Its Original Character?
Why Does Your Upcycled Dresser Sag Under the Weight of Modern Crockery?
There’s a common and romantic misconception that « they don’t make them like they used to. » While 1950s furniture is often beautifully crafted from solid wood, it’s a mistake to assume its strength is infinite. When your beautifully painted shelves start to bow under a stack of modern, heavy stoneware plates, you’re witnessing a phenomenon known as wood creep. This is the slow, permanent deformation of wood under a sustained load. The original shelving was designed for lighter goods—tins, flour bags, and smaller china sets—not the hefty dinnerware common today.
The joinery and shelf thickness of a mid-century larder were perfectly adequate for their time. However, decades of constant, albeit lighter, load have already fatigued the wood fibres. Introducing a significantly heavier load accelerates this process, leading to visible sagging that compromises both the aesthetic and the structural integrity of the piece. Research into furniture joints shows how even small, sustained loads cause measurable deformation over time. To avoid this, assessing the shelf’s capacity *before* you load it is critical. You can diagnose the structural integrity with a few simple steps.
A 3-Step Diagnostic for Shelf Integrity:
- Initial Deflection Check: Place a spirit level across the empty shelf. Any deviation from a perfectly horizontal plane indicates existing sag that will only worsen under load.
- Creep Measurement: Use a straight edge placed along the length of the shelf. Measure the maximum gap between the straight edge and the shelf surface to quantify the existing creep deformation.
- Load Test: Carefully apply a test load, roughly 50% of what you intend to store. Monitor the shelf for any immediate, excessive deflection. As a rule of thumb in woodworking, an acceptable deflection should not exceed 1/240th of the shelf’s span length.
If you detect significant sag, you’ll need to reinforce the shelves with steel L-bars or a central support spine before the unit can be considered truly functional for a modern pantry.
How to Retrofit Ventilation Into a Solid-Door Pantry Without Ruining Its Look?
One of the charming features of a 1950s larder is its solid, sturdy construction. But this very feature creates a problem for modern food storage: a lack of airflow. A sealed cupboard is a perfect environment for moisture to build up, leading to musty odours and shortened shelf life for items like bread, onions, and potatoes. The obvious solution—drilling a series of conspicuous holes—would destroy the unit’s vintage character. The challenge is to introduce ventilation that is both effective and invisible, preserving the period-appropriate aesthetic.
Fortunately, several discreet methods can achieve this, borrowing from traditional cabinet-making techniques. The goal is to create passive or active air circulation that works with the design, rather than against it. Choosing the right method depends on what you plan to store and the original style of your larder.
For a solution that marries function and beauty, consider installing decorative fretwork. This method adds an element of visual interest while providing ample ventilation.
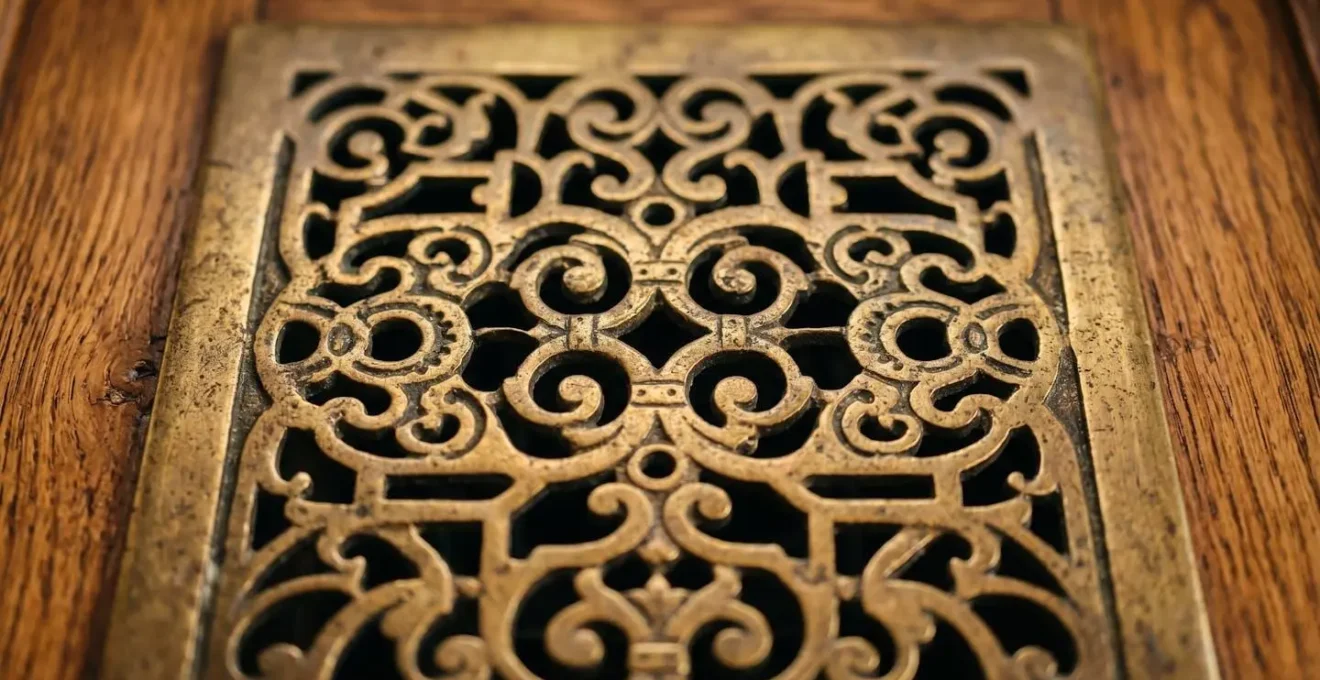
As shown in the detail above, a period-appropriate brass grille can elevate the design while serving a crucial function. Here are four professional methods for achieving invisible ventilation:
- The Hidden Air Gap: A beautifully simple solution. By recessing the back panel of the cupboard by about 3/8-inch, you can create a continuous gap at the top and bottom. This allows air to flow freely up the back of the unit while remaining completely hidden from the front.
- Decorative Fretwork: Install pierced metal panels, such as ornate brass grilles, into the doors or side panels. This was a common feature in antique furniture and is a perfect way to add authentic detail that is also functional.
- Active Airflow: For storing items that are more sensitive to moisture, you can integrate a silent, USB-powered 40mm computer fan in a top corner. Conceal it behind a piece of moulding for a completely modern solution in a vintage shell.
- The Chimney Effect: This passive method creates natural convection. By placing one small, discreet vent low on the unit and another high up, you encourage cooler, denser air to enter at the bottom and push warmer, moist air out at the top, ensuring constant circulation.
Period Brass or Modern Brushed Nickel: Which Hardware Suits a Mid-Century Unit Best?
Choosing hardware is one of the most exciting parts of a restoration, as it’s the « jewellery » that completes the look. However, it’s also a point where many projects go astray. The choice between period-accurate brass and contemporary brushed nickel isn’t just a matter of personal preference; it’s a decision that anchors the piece in a specific design context. Placing sleek, modern handles on a 1950s utility cupboard can create a jarring visual disconnect, while unlacquered brass might feel out of place in a minimalist, Scandinavian-style kitchen.
The right hardware should feel like a deliberate choice that either honours the piece’s origin or skillfully bridges the gap between vintage and modern. The key is to consider the overall style of your kitchen. Is your kitchen industrial, farmhouse, or contemporary? The larder, once restored, should feel like it belongs in that space. A mid-century piece is versatile; its hardware can be chosen to lean into its post-war utility roots or its emerging modernist sensibilities.
To make an informed decision, it’s helpful to see how different hardware styles align with specific kitchen aesthetics and cabinet eras. The following table provides a decision matrix to guide your choice, ensuring your hardware selection is both beautiful and contextually appropriate.
| Kitchen Style | Cabinet Era | Recommended Hardware | Finish | Shape Profile |
|---|---|---|---|---|
| Industrial | Post-War Utility (1945-1955) | Oil-rubbed bronze or matte black | Matte/Satin | Geometric, angular pulls |
| Scandinavian | 1950s Modern (1950-1960) | Brushed nickel or leather pulls | Brushed/Natural | Minimalist, linear handles |
| Farmhouse | Post-War Utility (1945-1955) | Unlacquered brass or ceramic knobs | Warm metals/Glazed | Round knobs, simple pulls |
| Eclectic/Transitional | 1950s Modern (1950-1960) | Mixed metals (brass + nickel) | Contrasting finishes | Mix of organic and geometric |
| Contemporary | Any Era | Brushed nickel or matte black | Monochromatic | Sleek, integrated handles |
Ultimately, the goal is harmony. Use the character of your larder and the style of your kitchen as your guide, and the perfect hardware will make itself known.
The Hidden Lead Paint Risk That Makes 40% of Pre-War Cabinets Unsafe to Sand
Before you enthusiastically take a power sander to that charmingly chipped original paint, stop. This is the single most critical safety step in vintage furniture restoration. Until its ban for residential use in the late 1970s, lead was a common additive in paint, prized for its durability and colour. This means there is a very high probability that any piece of furniture from the 1950s or earlier is coated in multiple layers of lead-based paint. The danger is not in the paint itself, but in the dust created by sanding, scraping, or dry-sanding it. Inhaling or ingesting this dust can cause serious health problems, particularly for children and pregnant women.
The risk is not theoretical. While the title notes pre-war cabinets, the danger extends well into the post-war era. For context, an EPA report found that a staggering 87% of homes built before 1940 contain lead-based paint, and the practice continued for decades. Assuming your 1950s larder is safe is a dangerous gamble. The only way to know for sure is to test for it. DIY test swabs are readily available, but for a definitive result, sending a paint chip to an accredited lab is the gold standard. If lead is present, dry sanding is absolutely out of the question. You must adopt a lead-safe removal protocol.
Your Action Plan: Lead-Safe Paint Removal Protocol
- Testing First: Use an EPA-recognized 3M lead test swab on multiple layers and areas of paint. If the test is positive or results are inconclusive, proceed as if lead is present. For ultimate certainty, send a small paint chip to an NLLAP-accredited laboratory for analysis.
- Encapsulation (Safest Method): For surfaces with intact paint, the safest route is not removal but encapsulation. Apply a specialized encapsulating primer (like ECOBOND LBP) which creates an impermeable barrier, sealing the lead paint beneath. This method generates zero hazardous dust.
- Chemical Stripping: If removal is necessary, use a modern, low-VOC gel or paste stripper. Apply it thickly, cover the area with plastic wrap to keep it wet, and let it work for up to 24 hours. Scrape the softened paint off gently with plastic tools to minimize dust.
- Wet Sanding (Last Resort): If very light sanding is unavoidable for smoothness, always wet the surface. Use a spray bottle to keep the area constantly damp, use wet/dry sandpaper (220-grit or finer), and clean up immediately with a HEPA-filtered vacuum and a mop with a TSP (trisodium phosphate) solution.
- Proper Disposal and PPE: Wear a respirator (N100 or P100), gloves, and eye protection. All waste materials (paint sludge, cloths, plastic sheeting) should be sealed in heavy-duty plastic bags and disposed of according to local hazardous waste regulations.
Working with lead paint is manageable, but it requires respect and a methodical approach. Prioritising safety ensures your beloved restoration project remains a source of joy, not a health hazard.
In What Order Should You Strip, Reinforce and Repaint a Vintage Kitchen Dresser?
After the thrill of acquiring a vintage piece, the temptation is to jump straight into the most satisfying part: applying a new finish. However, a successful and lasting restoration hinges on a strict and logical order of operations. Getting the sequence wrong can lead to wasted effort, a poor finish, or even damage to the piece. For instance, stripping a wobbly frame can put stress on already weak joints, causing them to fail completely. Similarly, drilling for new hardware after painting will break the paint seal and leave raw, unprotected wood exposed.
The professional sequence is always the same: structure first, then surface. You must treat the piece like a patient in a hospital: first, you stabilise its « bones, » then you address its « skin. » This ensures that the frame is strong enough to withstand the rigours of stripping, sanding, and modification. It also guarantees a flawless final finish, with all modifications cleanly integrated and sealed beneath the primer and paint.
Case Study: A 1950s Cupboard Restoration Timeline
A classic example from a recent project highlights this principle. A grandmother’s 1950s kitchen cupboard with warped shelves was brought in for restoration. The first step, before any paint was touched, was structural repair. The failing shelf supports were reinforced with wood glue and discreetly placed screws, then clamped and left to cure overnight. Only after the cupboard’s structural integrity was restored did the cosmetic work begin. The piece was then primed, a custom beadboard backing was fitted, and finally, it was painted. This methodical approach prevented further damage and ensured a beautiful, durable result.
To ensure your project runs smoothly, follow this professional-level order of operations:
- Phase 1 – Reinforce: This is always the first step. Inspect every joint. Re-glue and clamp any loose connections. Add reinforcing blocks or brackets to corners if needed. Install shelf supports (like steel L-bars or wooden spines) now, while the frame can handle the stress of being moved and worked on.
- Phase 2 – Strip: With the structure sound, you can now safely remove the old finish. Use the appropriate method determined by your lead paint test (chemical stripping, encapsulation, or wet sanding).
- Phase 3 – Modify: This is the time for all modern alterations. Drill holes for new hardware, cut openings for ventilation grilles, or create discreet pass-throughs for LED lighting cables. Doing this now ensures the raw edges will be sealed by the primer.
- Phase 4 – Prime: Apply the correct primer for the job. Use a shellac-based primer to block stains and bleed-through from old wood tannins, or an encapsulating primer if you are sealing in lead paint. Lightly sand between coats for a smooth foundation.
- Phase 5 – Paint: The final step. Work methodically from the inside-out and top-to-bottom. Paint the interior surfaces first. Then, paint the exterior, starting from the top and working your way down to prevent drips on already finished areas.
The Hardware Markup Mistake That Adds 30% to Your Custom Kitchen Bill
Once you’ve decided on the perfect style of hardware for your larder, the next step is sourcing it. This is where a costly mistake is often made. Many renovators default to big-box home improvement stores or high-end kitchen showrooms for their cabinet pulls and knobs. While convenient, these retailers are notorious for significant markups on decorative hardware. You could be paying a premium of 30% or more for the exact same product you could find elsewhere, or for a product of inferior quality compared to what’s available from specialist suppliers.
This markup isn’t just a few pennies; it can add up significantly, especially if you’re outfitting an entire kitchen. The hardware industry operates on a model where retail markups can range from 50% to 100% over the wholesale price. By purchasing your hardware from these mainstream sources, you’re essentially paying for the retailer’s overhead, marketing, and storefront costs. A savvy restorer knows to bypass this « cabinetry tax » by going to the same sources the professionals use, or by exploring artisan and vintage markets.
Sourcing hardware creatively not only saves money but often yields higher-quality, more unique pieces that will truly elevate your project. Here are four alternative sources for finding high-end hardware without the retail markup:
- Specialized Architectural Suppliers: Online retailers like Van Dyke’s Restorers or House of Antique Hardware cater to the restoration trade. They offer a vast selection of period-accurate hardware at prices often 30-40% lower than a kitchen showroom.
- Etsy and Artisan Makers: For truly unique pieces, explore marketplaces like Etsy. You can find small-batch, hand-forged hardware directly from metalworkers and brass foundries. The price is often comparable to mass-market items, but the quality and character are far superior.
- Architectural Salvage Yards: For authentic period hardware, nothing beats a reclamation yard. Places like Historic Houseparts offer original vintage pieces. You can authenticate solid brass (vs. plated) with a simple magnet test (a magnet won’t stick to solid brass) and by its weight.
- Restore the Originals: The most cost-effective option is to restore the hardware that came with the larder. A simple bath in white vinegar, a gentle scrub with 0000-grade steel wool, and a polish with a quality metal cleaner can bring original brass or nickel back to life for nearly zero cost.
The Sanding Mistake That Ruins 1 in 3 Veneered Antiques During DIY Restoration
Not all vintage furniture is solid wood. In fact, many high-quality mid-century pieces feature wood veneer—a very thin layer of decorative wood glued to a more stable, less expensive substrate. Veneer allows for beautiful grain patterns, like book-matching, that would be impossible with solid wood. However, it presents a major pitfall for the inexperienced restorer: sand-through. This is the catastrophic mistake of sanding through the thin veneer layer, permanently exposing the substrate underneath. It is incredibly difficult to repair and effectively ruins the piece.
The danger lies in how deceptively thin modern and even vintage veneers are. Some can be as thin as 0.3mm to 0.6mm—less than the thickness of a credit card. An aggressive pass with a power sander or coarse-grit sandpaper can burn through this layer in seconds. This is why the number one rule of restoring a piece of unknown construction is to assume it might be veneered and proceed with extreme caution. Never, ever begin with a power sander on a flat surface of a vintage piece.
To avoid this heartbreaking mistake, you must adopt a veneer-safe sanding protocol. This involves using the right tools, the right materials, and a light, even touch. The goal is to « scuff sand » the existing finish to provide a key for the new primer, not to strip the finish down to bare wood with sandpaper alone.
- Rule 1 – Conservative Grit Selection: Always start with a fine-grit sandpaper, such as 180-grit. Never use anything coarser than 150-grit, even on what appears to be a thick older veneer. You can then progress to 220-grit for a smooth finish.
- Rule 2 – Manual Block Sanding Only: On any flat surface, always wrap your sandpaper around a hard, flat sanding block. This distributes the pressure evenly. Using just your hand or a soft foam block will create uneven pressure, causing you to sand through on high spots.
- Rule 3 – The Pencil Hatch Test: Before sanding, lightly cover the entire surface with pencil hatch marks. As you sand gently and evenly with your block, the pencil marks will start to disappear. Stop sanding as soon as the marks are gone. This visual guide prevents you from over-sanding any single area.
- Rule 4 – The Chemical Alternative: For extremely delicate or thin veneers, it’s often best to avoid sanding altogether. Use a combination of denatured alcohol and fine 0000-grade steel wool to gently dissolve and abrade the old finish without removing any of the precious wood layer.
Key takeaways
- True restoration is about conservation, not just refinishing. Distinguish between desirable ‘character’ and ‘damage’.
- The correct order of operations—reinforce, strip, modify, prime, paint—is non-negotiable for a durable, professional finish.
- Always test for lead paint on pre-1978 furniture and use lead-safe practices; your health is more valuable than any antique.
How to Restore a Victorian Sideboard Without Erasing Its Original Character?
While our focus is a 1950s larder, the guiding philosophy of any good restoration can be drawn from the world of high-end antique conservation. The goal is not to make an old piece look brand new. A factory-perfect, flawless finish on a 70-year-old larder looks unnatural and erases its history. The true art lies in conservative restoration: a process that cleans and stabilises the piece while preserving the authentic patina, gentle wear, and subtle imperfections that tell its story. This is the difference between « character » and « damage. »
Damage includes things like dirt, grime, water rings, broken joints, or flaking paint—these should be repaired. Character, on the other hand, is the desirable evidence of a long life: the softened edges on a frequently used handle, the subtle fading of the finish where sunlight has touched it for years, the faint scuffs inside a drawer. These are the marks of authenticity that give a piece its soul. Erasing them is like erasing its memory. This philosophy advocates for cleaning over aggressive stripping whenever possible.
The Philosophy of Conservative Restoration
A professional approach, often applied to valuable Victorian pieces, prioritises this distinction. Instead of immediately stripping a piece with a darkened original finish, a conservator might first try cleaning it with a gentle mixture of mineral spirits and boiled linseed oil, applied with 0000-grade steel wool. This process often removes decades of built-up wax and dirt to reveal a beautifully preserved original finish underneath. This method not only respects the piece’s historical integrity but also maintains its market value, as the original finish is a key feature of provenance.
This mindset should guide every decision you make. Before you decide to paint over a wood finish, ask yourself if the original wood could be revived. Before you replace hardware, consider if the originals can be cleaned and restored. As one expert restorer notes, the biggest and most destructive mistakes often come from a failure to understand the materials you are working with.
The big one for new furniture refinishers is confusing real wood with veneer. I have seen so many people make the mistake of buying a piece of wood veneered furniture at the thrift store and thinking they can sand it down to refinish it, only to destroy the piece of furniture in the process.
– French Creek Farmhouse, How to Refinish Wood Furniture: A Step-by-Step Guide
Now that you have the blueprint for a structurally sound, safe, and beautiful restoration, you can approach your project not as a simple DIY task, but as an act of preservation. Begin today by assessing your piece, and you can bring that piece of history back to life with confidence and care.