The belief that you must choose between a beautiful velvet sofa and a happy pet is a myth; the secret lies in understanding fabric science, not in using endless throws.
- Permanent marks are often caused by low-density cushion foam, not just the velvet itself.
- Fading is determined by the dyeing method (solution-dyed polyester is superior) and can be prevented by mapping UV hotspots in your home.
- Successful stain removal depends on precise chemical principles, like using distilled water to avoid mineral deposits.
Recommendation: Adopt the mindset of a fabric care scientist. By understanding the ‘why’ behind fabric reactions, you can pre-empt damage and apply gentle, effective solutions.
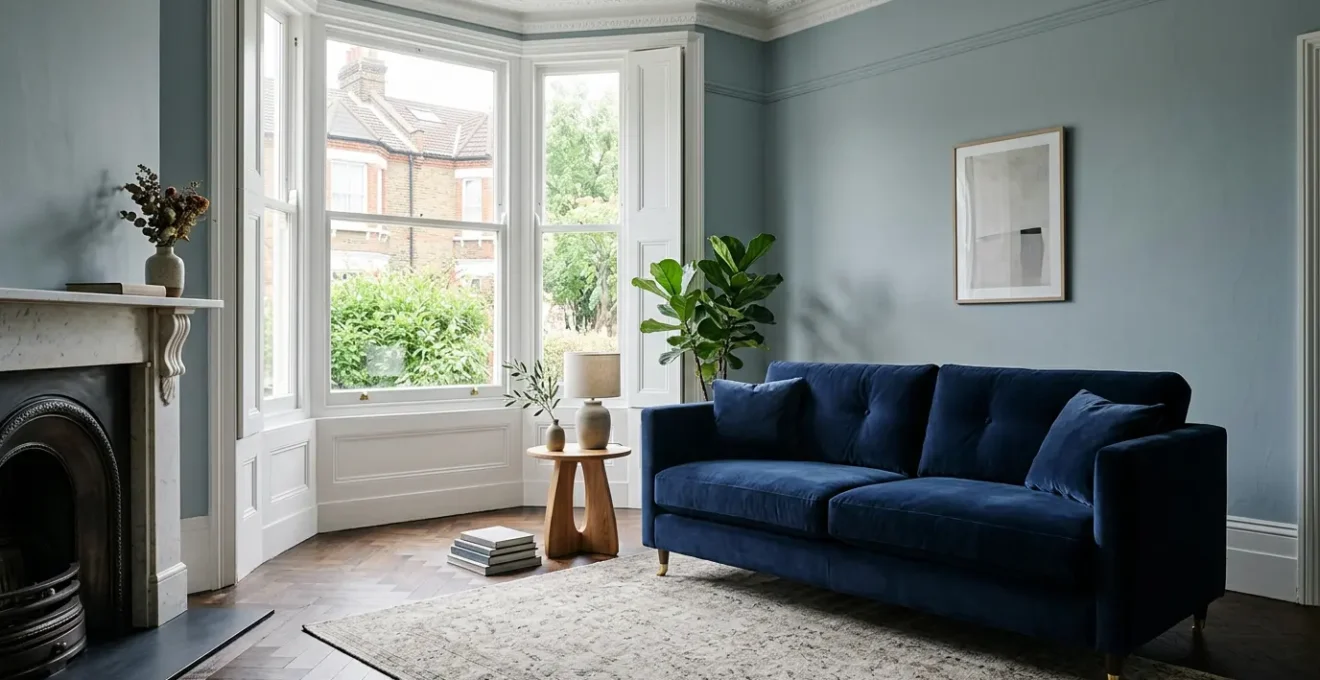
The moment of hesitation is familiar to many UK homeowners: you adore the luxurious feel of a velvet sofa, but the reality of sharing your space with a beloved dog or cat makes you pause. The common wisdom suggests a compromise is inevitable. You’re told to either forgo the elegance of velvet or resign yourself to a life of covering your prized furniture with throws and blankets, hiding its beauty to protect it from claws, hair, and the occasional accident. This creates a constant, low-level anxiety where your living room becomes a battleground between style and your furry family members.
Most advice centres on basic, often reactive, measures: groom your pet, vacuum constantly, and clean spills immediately. While not incorrect, these tips fail to address the core of the issue. They treat the fabric as a passive surface to be scrubbed, rather than a complex material with its own specific properties. But what if the key wasn’t simply more cleaning, but smarter care? What if you could protect your investment not by hiding it, but by understanding its vulnerabilities at a microscopic level?
This guide shifts the perspective from one of fear and compromise to one of empowerment and scientific understanding. We will explore the material science behind not only velvet but other cherished household fabrics like wool and linen. By understanding the dynamics of the velvet pile, the hygroscopic nature of linen fibres, and the chemical reactions of stains, you can move beyond generic tips. You will learn to diagnose issues, pre-empt damage, and apply precise, gentle interventions that preserve the integrity and aesthetic of your upholstery, proving that a pristine home and happy pets can, and should, coexist beautifully.
In this comprehensive guide, we’ll delve into the specific challenges and solutions for maintaining luxury fabrics in a real-world UK home. The following sections provide a roadmap to becoming a confident custodian of your home’s textiles.
Summary: A Scientific Guide to Protecting Velvet and Other Fine Fabrics in a Pet-Friendly UK Home
- Why Does Your Velvet Cushion Show Permanent Sitting Marks After One Week?
- How to Lift Red Wine From Cotton Velvet Without Watermarking the Fabric?
- Cotton or Polyester Velvet: Which Resists Fading in a South-Facing UK Lounge?
- The Window-Placement Mistake That Fades Velvet Sofas in Under 2 Years
- When Is the Best Season to Steam-Clean Velvet Upholstery in the UK?
- How to Remove Red Wine From a Wool Rug Without Calling a £150 Cleaner?
- The Hot-Wash Mistake That Shrinks Linen Curtains by 10% on First Launder
- How to Keep Linen Curtains Looking Crisp Without Constant Ironing?
Why Does Your Velvet Cushion Show Permanent Sitting Marks After One Week?
One of the most disheartening experiences for a new velvet sofa owner is discovering that a favourite spot—often occupied by a person or a curled-up pet—has developed permanent-looking indentations or ‘sitting marks’. The instinct is to blame the velvet’s delicate pile, but the true culprit often lies deeper. The issue is frequently not one of fabric but of physics, specifically the foam density of the cushion beneath. The velvet simply reveals the failure of the structure supporting it.
Most residential furniture is built to a price point, and one area where costs can be cut is the cushion filling. When low-density foam is used, it lacks the resilience to bounce back from compression. Over time, the foam’s internal structure breaks down, unable to support the velvet pile above it, leading to a crushed, flattened appearance. As a fabric care scientist would note, the problem is a failure in structural integrity. According to industry data, the furniture industry reveals that a standard density is around 1.8 pounds per cubic foot for residential seating. Anything significantly below this will be prone to premature collapse.
Before blaming your pet or the fabric, it’s crucial to assess the cushion’s core. A simple test can reveal the quality of your sofa’s interior support system.
- Press firmly into the cushion with your palm and hold for 10 seconds.
- Release and observe how quickly the foam returns to its original shape.
- If the impression remains visible after 30 seconds, the foam density is likely below the 1.8 lbs/ft³ standard.
- For a long-term fix, consider having cushions refilled by a UK upholsterer with high-density foam rated 2.0 lbs/ft³ or higher, which provides superior support and longevity.
How to Lift Red Wine From Cotton Velvet Without Watermarking the Fabric?
A red wine spill on cotton velvet is a classic domestic nightmare. The common reaction—scrubbing frantically with tap water and soap—is often what causes the most lasting damage: a flattened pile and a prominent ‘watermark’ ring. From a scientific perspective, this happens for two reasons. First, rubbing breaks and distorts the delicate velvet pile. Second, tap water in many parts of the UK is ‘hard’, meaning it contains minerals like calcium and magnesium. When the water evaporates, these mineral deposits are left behind, creating a visible ring that’s often more noticeable than the original stain.
The professional approach is a gentle, multi-stage protocol based on chemical principles, designed to lift the stain while protecting the fabric’s pile dynamics and avoiding mineral contamination. The key is to blot, never rub, and to use the correct type of water for the final rinse. This careful process ensures the texture and colour of the velvet remain uniform.
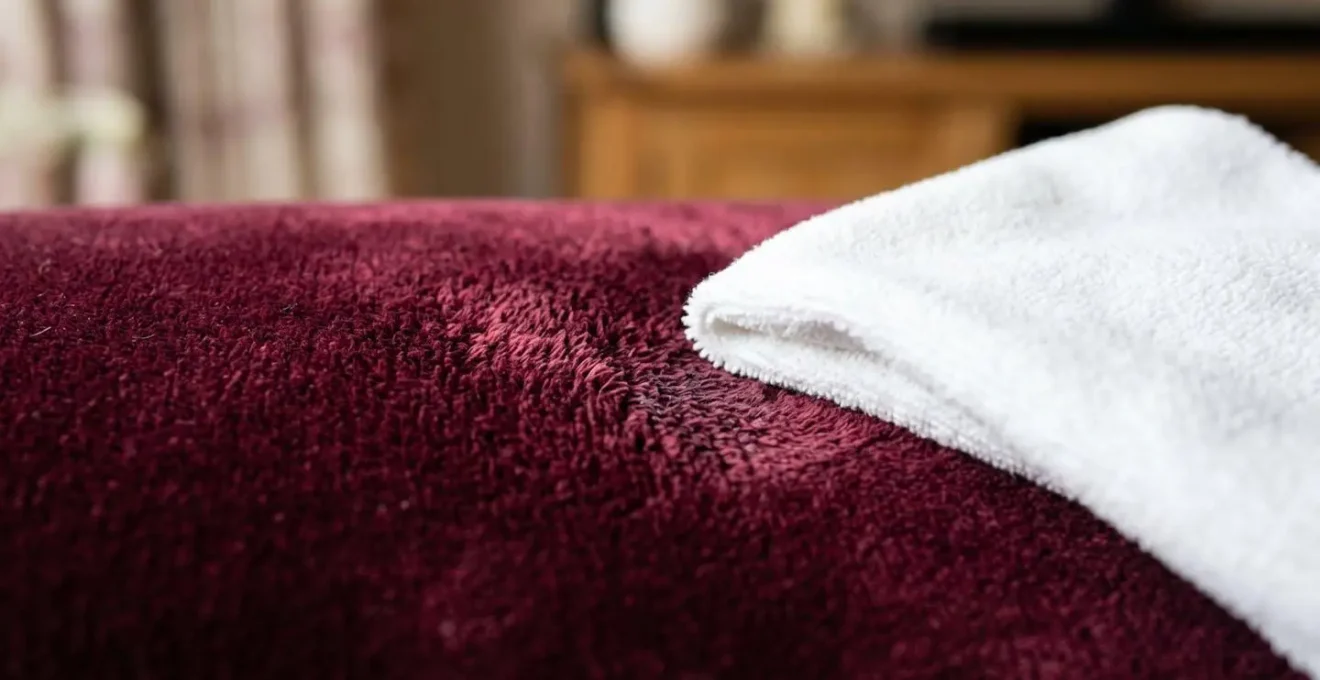
As the image above demonstrates, the correct technique involves a gentle dabbing or blotting motion. This lifts the liquid out of the fibres without grinding the stain deeper or crushing the pile. The goal is to wick the moisture away, not to scrub it in. To execute this properly, follow this professional method:
- Blot immediately with a clean, dry white cloth. Never rub, as this permanently damages the pile direction.
- Mix a solution of a few drops of mild dish soap into a bowl of cold water.
- Dampen a new, clean cloth with the solution and gently dab the stain, working from the outer edge inward to prevent it from spreading.
- For the final rinse, use only distilled or deionised water (widely available in UK supermarkets for steam irons). This is the crucial step to prevent watermarking.
- To blend the treated area, lightly mist the surrounding fabric with more distilled water and dry with a hairdryer on a cool setting, brushing the pile gently in its natural direction.
Cotton or Polyester Velvet: Which Resists Fading in a South-Facing UK Lounge?
Not all velvets are created equal, especially when facing their greatest long-term enemy: sunlight. A common mistake is choosing a velvet based on feel alone, without considering its location. In a south-facing UK lounge, which receives the most intense, direct sunlight throughout the day, the choice between cotton and polyester velvet is critical. The difference in their ability to resist photodegradation (fading from UV light) is dramatic and comes down to how the colour is applied at a molecular level.
Cotton velvet is typically ‘surface-dyed’, meaning the colour is applied to the yarn or woven fabric. The dye molecules sit on the outside of the fibres, exposed and vulnerable to being broken down by UV radiation. In contrast, high-quality polyester velvet is often ‘solution-dyed’. In this process, the colour pigment is mixed into the liquid polyester polymer *before* it is extruded into a fibre. The colour is an integral part of the fibre’s very structure, making it exceptionally resistant to fading. In fact, UV damage to furniture costs UK households an estimated £2.3 billion annually, a significant portion of which is due to fabric fading.
The following table, based on an in-depth analysis of velvet types, breaks down the key differences for any homeowner weighing their options for a sun-drenched room.
| Characteristic | Cotton Velvet | Polyester Velvet |
|---|---|---|
| UV Fading Resistance | Low – prone to rapid fading even in north-facing rooms | High – solution-dyed fibers resist fading |
| Typical Fade Timeline (South-Facing) | Noticeable fading within 6-12 months | Minimal fading over 2-3 years |
| Dyeing Method | Surface-dyed (color applied after weaving) | Solution-dyed (color integrated into polymer) |
| Finish | Matte, subtle appearance | Slight sheen, more resistant to crushing |
| Maintenance | Requires frequent professional cleaning | Easier to maintain, stain-resistant |
The Window-Placement Mistake That Fades Velvet Sofas in Under 2 Years
Even if you’ve chosen a fade-resistant polyester velvet, no fabric is completely immune to the sun. The most common and costly mistake is assuming all parts of a room receive equal amounts of sunlight. In reality, every room has ‘UV hotspots’—concentrated paths of direct sunlight that move throughout the day and year. Placing a cherished piece of furniture in one of these hotspots, even for just a few hours each day, can accelerate fading dramatically. The subtle but persistent UK sun, even in winter, is powerful enough to cause visible damage over 1-2 years.
Protecting your furniture is not about living in the dark; it’s about being strategic. The first step is to map these high-risk zones. While you could invest in UV-blocking window films—a highly effective solution, as applying a protective film can cost as little as £50-70 for a typical bay window—a no-cost audit should always come first. By understanding the sun’s daily journey across your room, you can make intelligent placement decisions that cost nothing but offer significant protection for your velvet sofa and other valuable items.
This simple ‘hotspot mapping’ technique allows you to visualize the danger zones and arrange your furniture accordingly, ensuring your velvet sofa is placed for maximum enjoyment and minimum sun exposure.
Your Action Plan: UV Hotspot Mapping for UK Homes
- Choose a bright sunny day (even weak winter sun is enough for this test).
- Starting at 9 AM, place sticky notes on the floor wherever direct sunlight falls in your room.
- Repeat this process every hour until 5 PM, using different coloured notes for each hour to track the sun’s path.
- At the end of the day, photograph the resulting pattern from above to create a permanent ‘sun map’ of the room.
- Identify the zones with the highest concentration of note clusters—these are your high-risk UV damage areas to be avoided for precious furniture.
When Is the Best Season to Steam-Clean Velvet Upholstery in the UK?
For deep cleaning and reviving the pile of a velvet sofa, steam cleaning is an effective method. However, the success of the treatment—and the prevention of subsequent problems like mildew or musty smells—is heavily dependent on *when* you do it. The timing should be synchronised with the UK’s unique climate patterns to ensure optimal drying conditions. Cleaning at the wrong time of year can trap moisture within the dense pile and foam, creating an ideal environment for microbial growth, which is especially concerning for homes with pets and their associated dander.
The goal is to find a window of time with moderate temperatures, low humidity, and good air circulation, allowing the fabric to dry thoroughly but gently. Winter is often too cold and damp, with homes sealed against the elements, trapping moisture inside. High summer can bring humidity, which slows evaporation. This is where a strategic, climate-aware approach becomes essential.
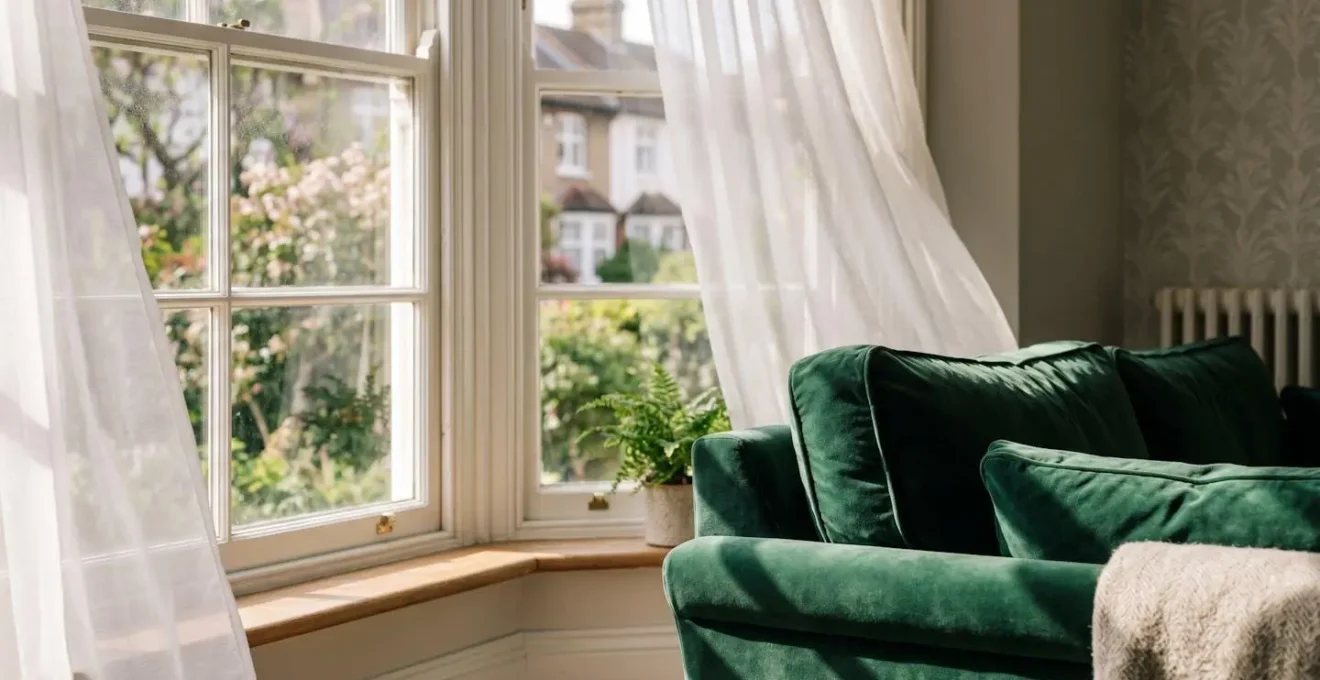
The ideal conditions, as pictured above, involve fresh air and gentle, indirect light. This natural ventilation is key to wicking away the residual moisture left after steam cleaning. An analysis by cleaning professionals highlights a specific period in the UK calendar as the optimal time for this task.
Case Study: Optimal Velvet Cleaning Windows in UK Climate
According to an analysis from professional cleaning experts, the best time to schedule velvet upholstery cleaning in the UK is during late April to May. During this period, central heating systems are typically switched off (reducing the circulation of airborne dust), but before the high humidity and pollen counts of summer arrive. This timing provides ideal natural drying conditions with open windows and moderate temperatures, preventing the micro-dampness retention that can occur when cleaning in autumn just before homes are sealed for winter.
How to Remove Red Wine From a Wool Rug Without Calling a £150 Cleaner?
Moving from the sofa to the floor, the principles of fabric science remain just as critical. A red wine spill on a wool rug presents a different chemical challenge than on velvet. Wool is a protein fibre, and the tannins in red wine are aggressive compounds that are desperate to form a permanent chemical bond with protein. Applying heat—for example, by using warm water—acts as a catalyst, permanently setting the stain in a process called tannin-protein bonding. This is why a quick, panicked response with the wrong method can make a professional clean impossible.
The correct, cost-effective approach is a two-stage chemical intervention that first prevents this bond from forming and then neutralizes and lifts the stain. It’s a method that relies on basic household items but applies them in a scientifically sound order. The key is to work with cold temperatures and use a mild acid (vinegar) to counteract the stain’s components before gently washing.
This protocol is designed to break down the stain without damaging the delicate structure of the wool fibres or stripping them of their natural lanolin, which provides inherent stain resistance.
- Stage 1 – Cold Shock: Immediately blot the excess wine with a white cloth. Then, apply only cold water to the area. This is the most critical step to prevent the stain from setting into the wool protein.
- Stage 2 – Acid Neutralization: Mix a 50/50 solution of white vinegar and cold water. Apply this to the stain with a clean cloth using a gentle dabbing motion to neutralize the tannins.
- Stage 3 – Wool-Safe Detergent: Apply a Wool Safe-approved detergent (like Woolite) diluted in cold water to lift the remaining residue.
- Stage 4 – Spoon Scraping: Use the curved edge of a teaspoon to gently scrape in the direction of the pile. This is much safer than a brush, which can fray the wool fibres.
- Stage 5 – Final Rinse: Blot thoroughly with a clean cloth and cold water, then allow the area to air dry completely, away from direct heat sources.
The Hot-Wash Mistake That Shrinks Linen Curtains by 10% on First Launder
Linen, cherished for its crisp, natural aesthetic, has a well-known vulnerability: shrinkage. The fibres of the flax plant, from which linen is made, are naturally rigid. During the weaving process, these fibres are held under tension. When they are suddenly exposed to hot water, this tension is released, and the fibres relax back to a more natural, compact state. This process, known as ‘relaxation shrinkage’, is irreversible and can easily reduce a curtain’s length by up to 10% on the very first wash, rendering them useless.
The common mistake is to treat linen like cotton, tossing it into a standard warm or hot wash. However, linen’s hygroscopic properties—its ability to absorb a large amount of water—make it particularly susceptible to sudden temperature changes. The key to preventing this catastrophic first-wash disaster is to manage the relaxation of the fibres gently and proactively. It involves a pre-emptive protocol that acclimatises the fibres to water before any agitation or heat is introduced.
Before you even think about washing, you should think like an archivist, documenting the original state of your curtains to accurately assess any changes. This methodical approach can save you from the costly mistake of ill-fitting curtains.
- Before First Wash: Use a tape measure to record the exact length and width of the curtains. Keep these measurements as a baseline reference.
- Pre-Soak Method: Fill a bathtub with cold water and submerge the curtains completely for at least 2-4 hours. This gently relaxes the fibre tension without the shock of a machine cycle.
- First Wash Protocol: After soaking, wash the curtains in the machine on a cold water cycle only, using a mild, gentle detergent.
- Drying Method: Remove the curtains from the machine while they are still damp. Immediately re-hang them on the curtain rod. The weight of the fabric and remaining water will naturally pull out most creases.
- Post-Wash Check: Once dry, re-measure the curtains and compare them to your original notes to determine if any minor hem adjustments are needed for the future.
Key takeaways
- The integrity of an upholstery fabric is only as good as the foam structure beneath it; investigate cushion density before blaming the material.
- The science of stain removal lies in the details: use distilled water to prevent mineral watermarks and cold temperatures to stop certain stains (like wine on wool) from setting.
- Proactively manage environmental factors by choosing solution-dyed fabrics for sunny rooms and mapping your home’s UV hotspots to inform furniture placement.
How to Keep Linen Curtains Looking Crisp Without Constant Ironing?
Once you have safely navigated the first wash, the ongoing challenge with linen curtains is maintaining their crisp appearance without resorting to the laborious task of ironing vast lengths of fabric. The tendency of linen to wrinkle is part of its natural charm, but a completely crumpled look is rarely the desired outcome. The secret to effortless maintenance lies not in applying heat with an iron, but in harnessing a force of nature that is both free and constantly available: gravity.
By managing the washing and drying process intelligently, you can make the weight of the fabric itself do the work for you. This approach minimizes the formation of deep-set wrinkles from the very start and uses the drying process as an opportunity to smooth the fabric. It’s a method that saves hours of effort and energy, all while being gentler on the linen fibres than the high heat of an iron.
Combining a low-spin wash with a ‘hang-damp’ technique is the foundation of this method. For those seeking a truly professional, permanently crisp finish, a simple hack used by interior designers provides the final touch.
- Washing: Use a low-spin cycle on your washing machine (a maximum of 400-600 rpm) to prevent the fabric from being aggressively creased and compacted.
- Re-hanging Technique: Remove the curtains from the machine while they are still noticeably damp, not fully spun-dry.
- Weight Method: Immediately hang the damp curtains back on their rod. The combined weight of the fabric and the water it holds will pull the fibres straight, smoothing out creases as they air dry.
- Bottom Weight Hack: For a permanently straight hang, purchase flat curtain weights from a UK haberdashery (like John Lewis or local sewing shops) and sew them into the bottom hem. This ensures they always hang perfectly.
- DIY Wrinkle-Release Mist: For minor touch-ups between washes, mix water, a capful of fabric conditioner, and a splash of rubbing alcohol in a spray bottle. Lightly mist the hung curtains to release small creases without a full wash.
By embracing these scientifically-grounded, proactive strategies, you can confidently care for all the cherished fabrics in your home. The key is to shift your mindset from one of reactive cleaning to one of preventative care, creating a space that is both elegantly appointed and joyfully lived-in, pets and all. To put this philosophy into practice, your next step is to perform a fabric audit in your own home.