Contrary to popular belief, a pressure washer and chemical cleaner are only temporary fixes for a green patio; the root cause is structural, not superficial.
- True prevention lies in understanding the stone’s porosity and ensuring structural integrity from the sub-base up.
- The right breathable sealer and a non-negotiable drainage slope are essential for long-term survival in the UK climate.
Recommendation: Audit your patio’s fundamental design—from its foundation to its surface treatment—to create a system that actively resists algae growth rather than just cleaning it away.
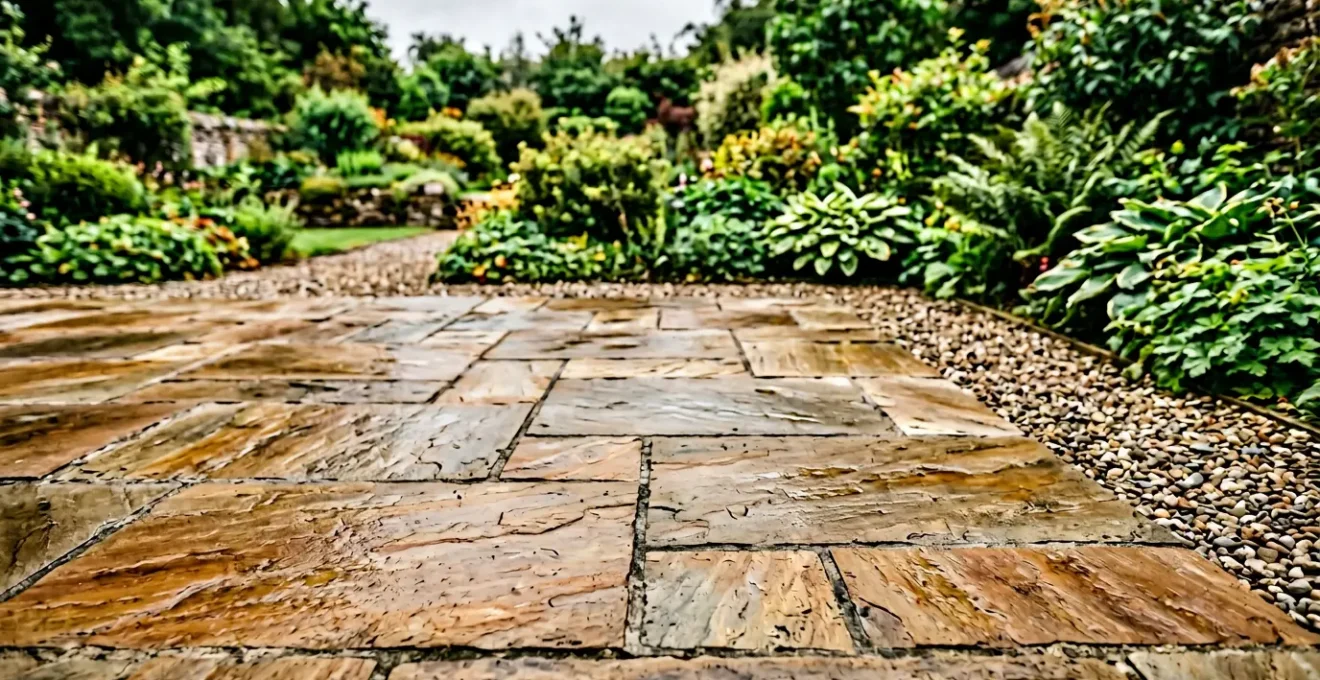
Watching your beautiful, expensive Indian Sandstone or limestone patio slowly succumb to a slick, green film each winter is a uniquely British frustration. The common response is a cycle of aggressive pressure washing and dousing with chemical cleaners. While these methods offer a fleeting sense of victory, they fail to address the fundamental problem and can even damage the stone in the long run.
The relentless greening is not a sign of poor cleaning; it’s a symptom of a deeper issue: uncontrolled moisture. In the damp UK climate, a patio that stays wet is a breeding ground for algae, moss, and lichens. The secret to a permanently clean patio doesn’t lie in a bottle of cleaner, but in understanding the science of water management from the ground up.
But what if the key wasn’t about *reacting* to the green, but *proactively engineering* a patio that stays naturally dry? This guide moves beyond the superficial cleaning tips. We will dissect the structural and material choices—from the hidden sub-base to the specific type of sealer—that determine whether your patio thrives or merely survives a British winter. It’s time to shift from a mindset of seasonal battling to one of long-term preservation.
This article provides a comprehensive roadmap for understanding the root causes of patio degradation and implementing professional-grade solutions. By exploring stone porosity, sealing technologies, sub-base construction, and drainage, you will gain the knowledge to protect your investment for years to come.
Summary: How to Prevent Indian Sandstone From Turning Green Every British Winter?
- Why Does Your Limestone Patio Stain Instantly While Your Neighbour’s Stays Clean?
- How to Seal Travertine Pavers to Withstand 5 Years of UK Rain and Frost?
- Genuine Slate or Porcelain Replica: Which Resists Cracking in British Winters?
- The 50 mm Gravel Shortcut That Makes Stone Patios Sink Within 3 Years
- When to Lay Natural Stone in the UK: The Frost-Free Window Professionals Use?
- The Paving Slope Mistake That Floods 1 in 5 UK Patios During Heavy Rain
- How to Choose Between NHL 2, NHL 3.5 and NHL 5 Lime for Your Stone Walls?
- How to Use Your Patio 8 Months a Year Despite British Weather?
Why Does Your Limestone Patio Stain Instantly While Your Neighbour’s Stays Clean?
The frustrating difference between your perpetually stained limestone and your neighbour’s pristine patio often comes down to one crucial, invisible factor: porosity. Not all natural stone is created equal. Limestone, in particular, exhibits a vast range in its ability to absorb water. This isn’t a defect; it’s a fundamental characteristic of its geological formation. Some dense varieties are almost impermeable, while softer, more open-pored types act like a sponge.
This variation is quantifiable. Industry testing reveals that the water absorption rate of limestone can vary dramatically, from as little as 0.2% to over 12% by weight. A highly porous stone will readily soak up rainfall, dissolved dirt, and nutrients from fallen leaves through a process called capillary action. This moisture-rich environment is the perfect incubator for algae and moss. Your neighbour’s stone might simply have a much lower absorption rate, meaning water and contaminants remain on the surface where they are easily washed away, rather than being drawn deep into the stone’s structure.
Understanding the specific porosity of your paving is the first step in any preservation strategy. If you have a highly absorbent stone, you are in a constant battle against nature. This doesn’t mean the stone is low quality; it simply means it requires a more robust and technical approach to sealing and maintenance to keep it from turning green and stained. The choice of stone dictates the necessary level of care.
Ultimately, preventing stains is less about frantic cleaning and more about controlling how water interacts with the stone’s surface from the very beginning.
How to Seal Travertine Pavers to Withstand 5 Years of UK Rain and Frost?
Sealing natural stone like travertine is not just a suggestion in the UK; it’s a necessity for long-term survival. However, the word « sealer » is misleading, as it implies creating an impermeable plastic-like film. This is precisely what you must avoid. The key to effective, long-lasting protection is choosing a sealer that allows the stone to « breathe »—a property known as water vapour permeability. A sealer that traps moisture is worse than no sealer at all, as it creates a damp, humid environment just beneath the surface, perfect for algae growth and disastrous during a freeze-thaw cycle.
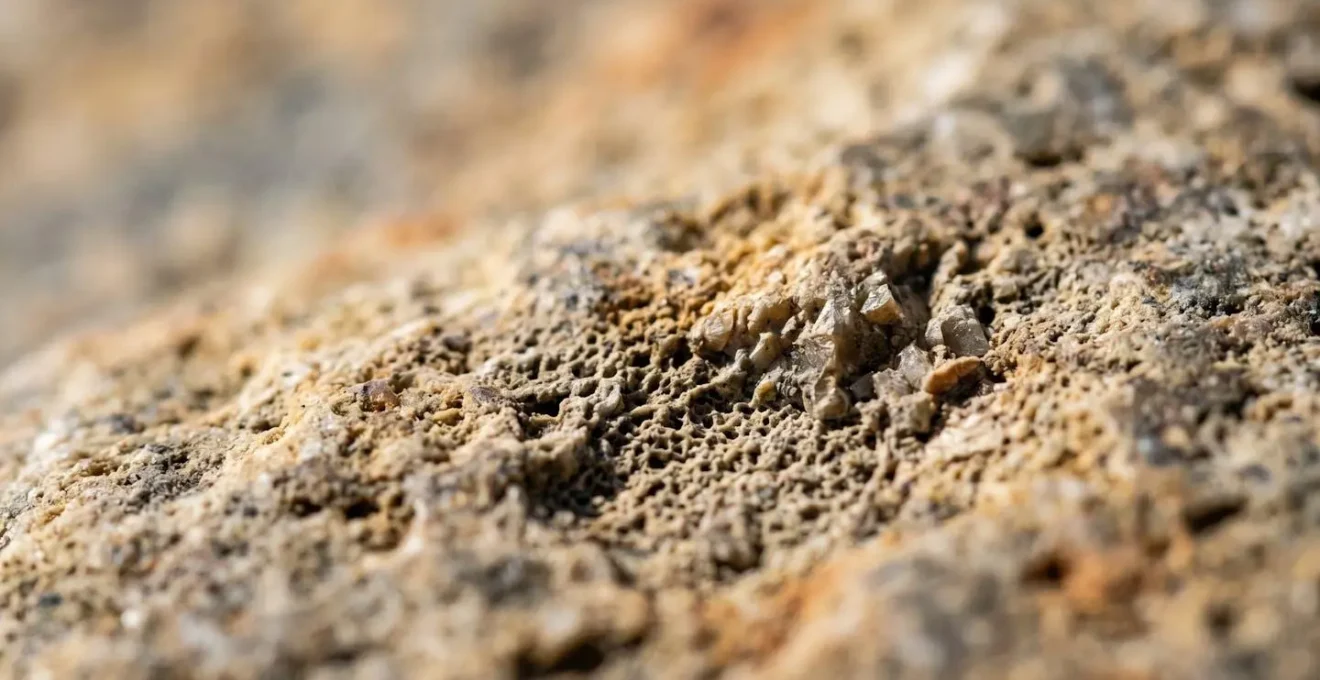
The image above reveals the intricate, porous structure of natural stone. To protect it effectively, you need a sealer that penetrates deep into these pores rather than just sitting on top. This is where different sealer technologies diverge significantly. Topical acrylic sealers form a surface film that offers good initial water resistance but has low breathability and typically fails within 1-2 years, often peeling and requiring costly chemical stripping. The professional’s choice is a penetrating or impregnating sealer, which lines the pores of the stone without blocking them.
To make an informed choice, it’s crucial to understand the trade-offs between different sealer technologies. As a comparative analysis of stone sealers shows, performance and longevity vary widely.
| Sealer Technology | Realistic Lifespan (Years) | Breathability (Water Vapour Permeability) | Water Stain Resistance | Oil Stain Resistance | Cost per m² per Year |
|---|---|---|---|---|---|
| Acrylic (Topical) | 1-2 | Low (traps moisture) | Good | Fair | Higher (frequent reapplication) |
| Silane/Siloxane (Penetrating) | 5-10 | Excellent (fully breathable) | Excellent | Poor | Moderate |
| Fluoropolymer (Impregnating) | 3-5 | Excellent (breathable) | Excellent | Excellent | Lower (longer intervals) |
For a typical UK patio facing both rain and the risk of BBQ stains, a high-quality fluoropolymer impregnating sealer offers the best balance. It provides excellent resistance to both water and oil-based stains while maintaining full breathability, ensuring a lifespan of 3-5 years before reapplication is needed. This approach protects the stone from within, preventing the ingress of water that leads to greening and frost damage, without compromising its natural appearance or creating a maintenance headache.
By choosing a breathable, impregnating solution, you are not just sealing the surface; you are engineering a defence system that works with the stone’s natural properties.
Genuine Slate or Porcelain Replica: Which Resists Cracking in British Winters?
When choosing a dark, contemporary paving material, the choice often comes down to genuine natural slate versus a high-quality porcelain replica. While both can look stunning, their performance in the face of a harsh British winter is fundamentally different, and the deciding factor is, once again, water absorption. Genuine slate, being a natural metamorphic rock, is formed in layers. In some lower-grade slates, these layers can be prone to delamination or « spalling » when water ingresses and freezes, causing the surface to flake away.
Porcelain, on the other hand, is an engineered product manufactured under extreme heat and pressure. This process creates a vitrified material that is incredibly dense and non-porous. According to industry standards, outdoor-grade porcelain pavers must have a water absorption rate of less than 0.5%. This near-zero porosity is its superpower. With virtually no water entering the body of the tile, the destructive force of the freeze-thaw cycle is completely neutralised. There is no water to freeze, expand, and crack the paver from within. For pure resistance to winter cracking, porcelain is unequivocally superior.
However, the decision isn’t just about technical performance; it’s about total cost of ownership. While premium porcelain can have a higher initial cost, its near-zero maintenance (no sealing required) and exceptional durability can make it more economical over the lifespan of a patio. A full lifecycle cost analysis is the professional way to compare the two materials.
Your Action Plan: 20-Year Patio Lifecycle Cost Audit
- Identify Cost Points: List all predictable expenses for both slate and porcelain: initial material cost per m², specialist installation fees (mortar bed vs. adhesive), biannual sealer costs (for slate only), and potential repair/replacement costs.
- Gather Real-World Data: Collect current, local quotes for each cost point. Do not rely on generic online estimates. Factor in the higher labour cost for skilled porcelain installation versus traditional slate laying.
- Evaluate Maintenance Tolerance: Honestly assess your willingness to commit to the regular maintenance schedule required for slate (stripping and resealing every 2-3 years). Compare this to the ‘install and forget’ nature of porcelain.
- Assess Climate Risk: Quantify the risk based on your location. Is your patio in a shaded, damp area prone to severe frosts? If so, the near-zero frost-spalling risk of porcelain carries a higher value.
- Calculate True Cost: Create a simple spreadsheet. For each material, sum the (Initial Total Cost) + (Total Sealing Costs over 20 years) + (Estimated Repair Costs over 20 years). This reveals the true cost per year, not just the upfront price tag.
Ultimately, choosing porcelain is an investment in predictable performance and minimal maintenance, while choosing high-quality slate is a commitment to the unique beauty and required upkeep of a natural material.
The 50 mm Gravel Shortcut That Makes Stone Patios Sink Within 3 Years
Failure to properly drain a pavement can cause all sorts of problems. Water on the surface encourages mosses, algae and other vegetation to colonise the paving.
– Pavingexpert, Drainage for Pavements technical guide
This statement from paving authority Pavingexpert gets to the heart of the matter. A green patio is often a symptom of a sinking patio, and a sinking patio is almost always the result of a failed sub-base. The most common shortcut taken by unscrupulous or inexperienced installers is the « 50 mm gravel » method—a shallow layer of pea gravel spread directly onto the soil. This approach is doomed to fail.
Pea gravel consists of small, rounded stones that do not interlock. Under load, they simply shift and move, like marbles in a bag. A patio laid on such a base will inevitably develop dips, low spots, and uneven pavers. These low spots become puddles, and puddles, as we know, are the primary cause of persistent green algae. The problem is not the stone; it’s the unstable, water-logged foundation beneath it.
Best Practice: The Engineered Sub-base System
The UK industry standard for a durable patio sub-base is a multi-layer engineered system designed for stability and drainage. As detailed in professional guides, this system involves excavating to a sufficient depth (typically 150-200mm for pedestrian patios), laying a geotextile membrane to prevent the sub-base material from mixing with the ground soil, and then building up a layer of MOT Type 1 aggregate. This is a crushed stone with a specific mix of sizes that, when compacted, locks together to form a solid, stable, and load-bearing platform. This aggregate is laid in layers (or ‘lifts’) of 50-75mm, with each layer being mechanically compacted before the next is added. This meticulous process creates the unyielding foundation your paving needs to remain flat, stable, and free from puddles for decades.
The difference between a 50mm layer of loose gravel and a 150mm compacted MOT Type 1 sub-base is the difference between a patio that sinks in three years and one that lasts a lifetime. The sub-base is the most critical component for long-term performance, and it’s the one part you can’t see. Insisting on a properly engineered sub-base is the single most important investment you can make in the longevity and appearance of your patio.
A solid, well-drained foundation is the ultimate defence against both subsidence and the green slime it encourages.
When to Lay Natural Stone in the UK: The Frost-Free Window Professionals Use?
Choosing the right time of year to lay a natural stone patio in the UK is not a matter of convenience; it’s a critical factor that determines the long-term integrity of the installation. The primary enemy is frost. Laying stone pavers on a frozen or frost-prone sub-base, or using a mortar bed when temperatures are set to drop below freezing, can have catastrophic consequences. Water in the mortar mix expands as it freezes, breaking down the cement’s molecular structure. This prevents the mortar from curing correctly, resulting in a weak, crumbly bed that offers no support to the pavers above and will fail prematurely.
Professional installers in the UK operate within a strict « frost-free window ». This isn’t a fixed set of dates on a calendar but is determined by a rigorous assessment of ground and weather conditions. The golden rule is that the ambient temperature must remain consistently above 5°C for at least 48 hours before, during, and ideally for a 7-day curing period after the installation. Working outside this window is a gamble that can trap moisture within the system, leading to efflorescence (white mineral salts appearing on the surface) and a structurally compromised patio.
To ensure a successful installation, a professional will follow a strict protocol before committing to lay a single slab:
- Temperature Verification: Confirm that both daytime and, crucially, nighttime temperatures are forecast to stay above 5°C for the entire installation and initial curing period.
- Ground Condition Test: Physically check the sub-base by digging a small test pit or using a probe. The ground must be free of ice crystals and not feel frozen to the touch at the full depth of the sub-base.
- Sub-base Moisture Check: Assess the sub-base for waterlogging. It should be damp for compaction but not saturated. Water should not pool at the bottom of a test pit.
- Paver Moisture Content: Ensure the stone pavers themselves are dry. Slabs that are saturated from rain or have been stored in damp conditions can introduce excessive moisture into the mortar bed.
- Mortar Additive Discussion: In borderline conditions (e.g., autumn), discuss the use of frost-proofing accelerants. While they can help, they are not a substitute for proper conditions and can sometimes increase the risk of other issues like efflorescence.
Patience is key. Waiting for the right weather window is far less costly than rectifying a failed installation caused by a premature frost.
The Paving Slope Mistake That Floods 1 in 5 UK Patios During Heavy Rain
In a country experiencing increasingly intense rainfall, managing surface water is no longer an afterthought—it’s a critical design consideration. The Environment Agency’s recent assessment highlighted a dramatic rise in flood risk, with the number of properties in England at risk from surface water flooding increasing by 43%. While this refers to wider infrastructure, the principle applies directly to your patio: if you don’t tell water where to go, it will find its own path, often towards your house foundations or creating a permanent swamp on your lawn.
The most common and damaging mistake is laying a patio that is perfectly flat or, even worse, slopes back towards the house. A properly installed patio must have a deliberate, consistent slope, or « fall », to direct rainwater away from buildings and towards a designated drainage point, such as a lawn, flowerbed, or channel drain. The industry standard recommendation for this fall is typically between 1:60 and 1:80. This means for every 60 to 80 units of horizontal distance, the patio should drop by 1 unit. For example, a 3-metre wide patio should have a fall of approximately 4-5cm from one side to the other.
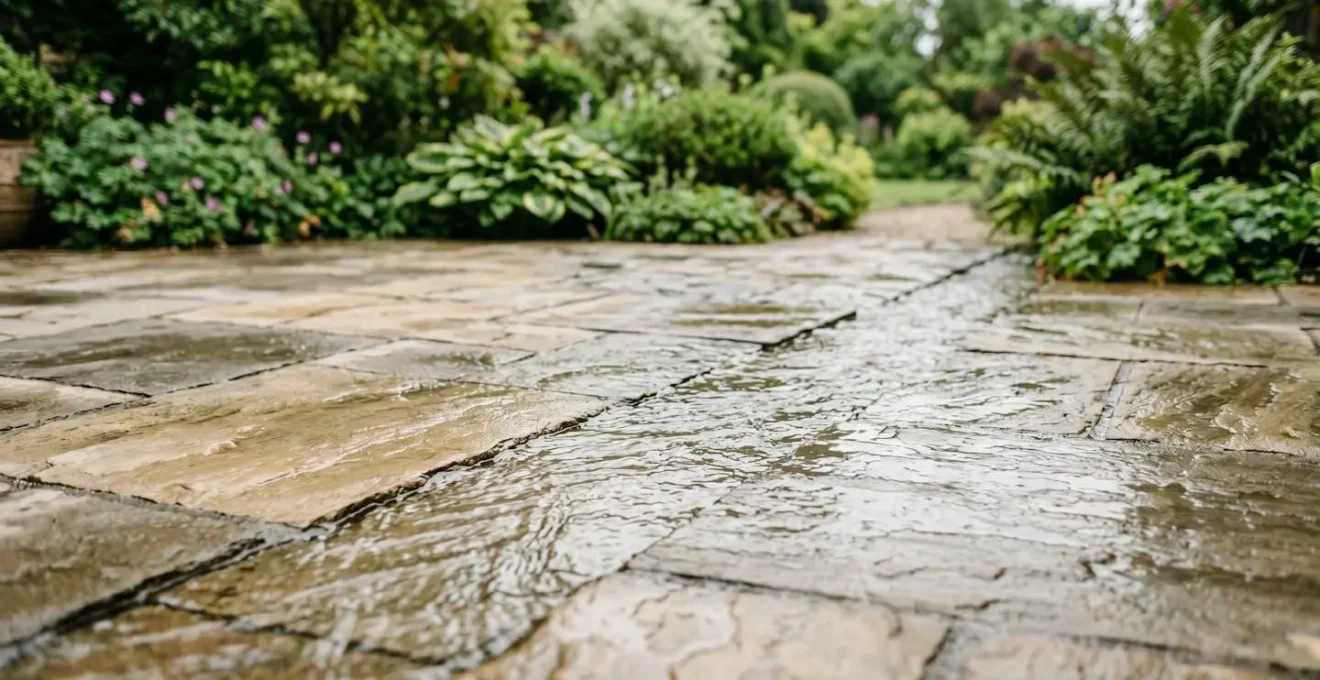
This subtle slope is often invisible to the naked eye but is fundamental to the patio’s performance. As the image demonstrates, a correctly engineered fall ensures water flows efficiently across the surface, preventing it from pooling. « Ponding » water is the number one cause of localised, intense algae growth and can accelerate staining and frost damage. A lack of adequate fall is why you might see green patches appear in the same spots year after year, no matter how much you clean them. It’s a design flaw, not a maintenance issue.
Before any paving is laid, confirming the direction and gradient of the fall with your installer is a conversation that will save you from years of drainage headaches and a perpetually green patio.
How to Choose Between NHL 2, NHL 3.5 and NHL 5 Lime for Your Stone Walls?
When working with traditional stone walls, whether for retaining walls in the garden or for building features, the choice of mortar is as important as the stone itself. Using a modern, hard cement mortar on traditional stone is a cardinal sin in building conservation. Cement is often harder, stronger, and less breathable than the stone it surrounds. This traps moisture within the wall and causes stress, leading to the stone itself failing (spalling and cracking) while the mortar remains intact. The golden rule is that the mortar must always be softer and more breathable than the stone, acting as a sacrificial element.
This is where Natural Hydraulic Lime (NHL) mortars come in. NHL is a traditional building material that cures by reacting with both water and air, creating a mortar that is breathable, flexible, and gentle on the surrounding stonework. The numbers—NHL 2, NHL 3.5, and NHL 5—refer to the mortar’s compressive strength and hydraulicity (its ability to set in damp conditions), from weakest to strongest.
Choosing the correct grade is a process of matching the mortar to the stone’s hardness and the wall’s exposure to weather:
- NHL 2: This is the softest and most breathable grade. It is ideal for internal work or for constructing walls with very soft, porous stone like chalk or soft sandstone. Using a harder mortar on such stone would quickly destroy it.
- NHL 3.5: This is the general-purpose workhorse. It offers a good balance of strength, flexibility, and breathability, making it suitable for most external pointing and general building work with moderately dense stones like limestone or harder sandstones.
- NHL 5: This is the strongest and most hydraulic grade. Its use should be reserved for severe exposure conditions, such as below-ground works, sea walls, or for building with very hard, dense stones like granite or slate where a stronger mortar is required. Using it on softer stone would be a mistake.
In short, you don’t choose the strongest mortar available; you choose the weakest mortar that is appropriate for the job, ensuring the longevity of the stone itself.
Key Takeaways
- The root cause of green patios is uncontrolled moisture, determined by the stone’s porosity and the structure’s ability to drain.
- An engineered sub-base and a correct surface slope (fall) are the non-negotiable foundations for a dry, stable, and algae-resistant patio.
- Always choose a breathable, impregnating sealer over a topical one to protect the stone from within without trapping moisture.
How to Use Your Patio 8 Months a Year Despite British Weather?
A green, slimy patio is a slip hazard, making it unusable during the damp shoulder seasons of spring and autumn. Therefore, a proper cleaning and sealing regime is not just aesthetic; it’s a fundamental prerequisite.
– Elite Jetting UK, Expert Guide to Cleaning Indian Sandstone Patio
This expert observation highlights a crucial point: the fight against a green patio is not just about looks, it’s about usability. A slippery, damp surface effectively shortens the time you can enjoy your outdoor space from a potential eight months to just the driest three or four months of summer. The goal of a well-designed patio is to extend its use into the cooler, damper « shoulder seasons » of spring and autumn. This is achieved not just by cleaning, but by implementing a holistic system that keeps the patio surface dry, safe, and inviting.
A patio that is engineered to manage water effectively—with a proper sub-base, a functional fall, and a breathable sealer—is inherently more usable for more of the year. It dries faster after rain, is less likely to harbour slippery algae, and is more resilient to the freeze-thaw cycles of early spring and late autumn. Beyond these foundational elements, several proactive design strategies can dramatically increase your patio’s year-round usability in the UK climate.
By integrating these features, you transform the patio from a passive surface into an active, all-weather outdoor room:
- Overhead Shelter: Installing a glass veranda, a retractable awning, or even a simple pergola with a polycarbonate roof can reduce the amount of rain hitting the stone by over 90%, drastically cutting down on moisture and the associated algae growth.
- Integrated Heating: Strategically placed infrared heaters do more than provide warmth for users; they also gently heat the stone surface, accelerating the evaporation of residual dampness after a shower.
- Advanced Drainage: In addition to a standard fall, incorporating channel drains at the low edge of the patio or around the perimeter ensures that even the heaviest downpour is carried away swiftly, preventing any standing water.
- Weather-Resistant Furniture: Choosing furniture made from materials like aluminium or all-weather wicker means it can be left in place without fear of it staining the stone or deteriorating, making the space always ready for use.
Ultimately, a patio that you can use from March through October is the result of a conscious design process that prioritises water management and user comfort from the very beginning.