In summary:
- Your smart thermostat isn’t saving you money because it’s fighting with other parts of your heating system, like radiator valves (TRVs).
- True savings come from « teaching » your thermostat about your home’s unique heat loss (its thermal inertia) and your specific UK energy tariff.
- Fixing a single common mistake with TRV settings in the thermostat’s room can significantly reduce wasted heat.
- Connecting your thermostat to real-time energy price data allows for « tariff-aware heating, » warming your home when gas is cheapest.
You invested in a smart thermostat, lured by the promise of effortless savings and a perfectly comfortable home. Yet, your gas bill remains stubbornly high, and you find the heating on at the most baffling times—like when the house is empty. The common advice to « set a schedule » or « use away mode » feels inadequate and misses the point. You’re left wondering if the « smart » device is actually outsmarting you.
The frustration is understandable. Most homeowners treat their learning thermostat like a fancy timer, overlooking its true potential. The reality is that these devices don’t operate in a vacuum. They are the brain of a complex home heating ecosystem, and if they aren’t taught how to command their troops—the boiler, the pipes, the radiators—they create inefficiency and waste.
The key to unlocking significant savings isn’t just telling your thermostat *when* to turn on, but teaching it *how* to work intelligently with your home’s unique characteristics and the specific financial realities of the UK energy market. This guide moves beyond the basics to reveal the system-level thinking required. We’ll explore why your thermostat makes mistakes, how to synchronise it with your smart meter for cost-based decisions, and how to resolve the hidden conflicts within your heating system that are costing you money.
By understanding and implementing these strategies, you can transform your thermostat from a confusing gadget into a powerful tool, trained to cut your gas consumption and finally deliver on its promise of a smarter, more efficient home. This article breaks down the essential steps to achieve this, from choosing the right hardware to fine-tuning its interaction with your entire home.
Summary: Train Your UK Smart Thermostat and Save on Gas
- Why Does Your Smart Thermostat Heat the House When You’re at Work?
- How to Link Your Nest Thermostat to Your Smart Meter for Real-Time Cost Display?
- Nest, Hive or Tado: Which Learning Thermostat Works Best With a UK Combi Boiler?
- The TRV Override Mistake That Wastes Heat in 40% of UK Smart-Thermostat Homes
- When Is the Best Month to Install a Learning Thermostat Before UK Winter?
- Loft Conversion or Garage Conversion: Which Adds More Per-Square-Metre Value in the South East?
- How to Choose a Smart Meter Display That Talks to Your Home Automation System?
- How to Hide Smart Home Tech So Your Living Room Looks Like a Home, Not a Showroom?
Why Does Your Smart Thermostat Heat the House When You’re at Work?
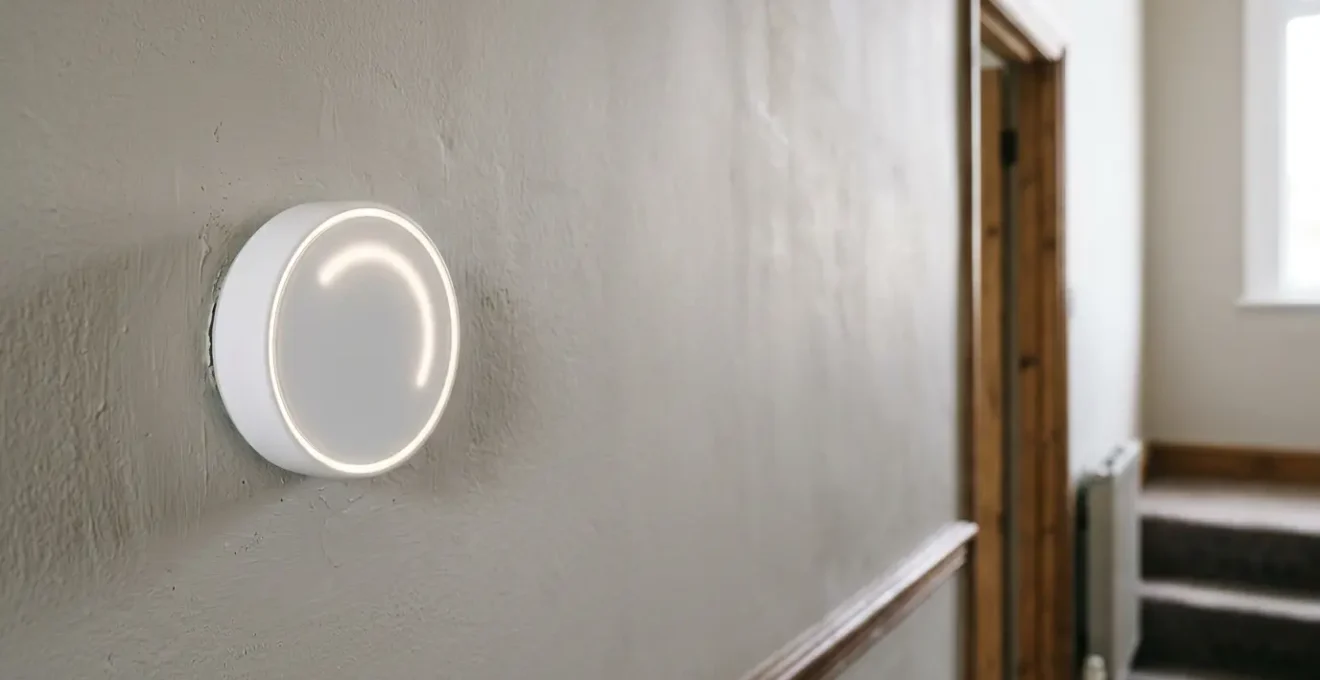
The most common frustration with a smart thermostat is discovering it’s heating an empty house. This isn’t a bug; it’s a misinterpretation. The thermostat’s « learning » is based on what its sensors detect, and these sensors can be easily fooled by what we can call « occupancy ghosts. » In the new era of flexible work, where 28% of the UK workforce engages in hybrid working, unpredictable schedules make passive occupancy detection even more challenging.
These ghosts can be a pet walking past the sensor, or even strong sunlight hitting the device, causing it to misread the room’s temperature. Research highlights that sensor placement is a fundamental limitation. A thermostat in a hallway might interpret someone walking from the kitchen to the bathroom as continuous presence, keeping the heating on unnecessarily. This problem is particularly acute in older UK properties, where a sensor in a sun-facing bay window of a Victorian home can be triggered by direct solar gain, not actual room temperature.

As the image shows, even subtle environmental factors can influence a sensor. To combat these occupancy ghosts, you must actively train the thermostat. This involves using the app to confirm when you are genuinely « Away, » teaching the algorithm to ignore false positives. Some systems also allow you to adjust sensor sensitivity or, more effectively, add additional sensors in key rooms to build a more accurate picture of true occupancy, moving beyond a single, fallible point of reference. Ultimately, the thermostat is a student, and it requires your input to graduate from basic automation to true intelligence.
How to Link Your Nest Thermostat to Your Smart Meter for Real-Time Cost Display?
A smart thermostat knows the temperature, but to be truly effective at saving money, it needs to know the *cost*. Linking it to your smart meter data is the key to unlocking « tariff-aware heating. » However, a direct, universal link for real-time cost display on the thermostat itself is not a standard feature in the UK. The In-Home Display (IHD) you received from your energy supplier gets near real-time data, but the thermostat doesn’t. Instead, you must use a more strategic, manual approach by leveraging your supplier’s variable tariff data.
For UK homeowners on agile tariffs like those from Octopus Energy, this method is transformative. These tariffs feature fluctuating half-hourly prices based on wholesale energy costs. The goal is to teach your thermostat to heat the home when energy is cheap and coast through expensive peak periods. This requires a hands-on approach to scheduling, based on cost rather than just time. Critically, you are working with data that has different update speeds; your IHD may show electricity data updated every 10 seconds, but your supplier app’s pricing is for future slots, published daily.
This « cost-based scheduling » allows you to exploit your home’s thermal inertia—its natural ability to retain heat. By pre-heating your home using cheap overnight electricity, you can keep the thermostat at a low maintenance temperature during the expensive 4pm-7pm peak, saving significantly without sacrificing comfort. Here’s how to implement this with a variable tariff:
- Check the next day’s 48 half-hourly prices, typically published at 4pm daily via your supplier’s app.
- Identify the cheapest off-peak slots, often overnight (e.g., 12am-5am) or during periods of high renewable generation.
- Manually override your thermostat’s schedule to pre-heat the house for an hour or two during these ultra-cheap slots before you wake up.
- Set the thermostat to a lower « setback » temperature (e.g., 18°C) during peak price hours (e.g., 4pm-7pm).
- Use the « boost » function sparingly, as a one-hour boost during a peak period can cost five to six times more than an off-peak one.
Nest, Hive or Tado: Which Learning Thermostat Works Best With a UK Combi Boiler?
Choosing the right smart thermostat for a UK home often comes down to one crucial factor: its compatibility with your boiler. With the majority of UK homes relying on combi boilers, the ability of a thermostat to communicate effectively with the boiler is paramount for efficiency. This communication is governed by a technology called OpenTherm, which allows the thermostat to modulate the boiler’s flame size, rather than simply turning it on and off (known as Relay control).
Modulating control is far more efficient. Instead of the boiler running at 100% power and then shutting off, it can run at, say, 30% power for a longer period, maintaining a steady temperature with less gas. This reduces wear and tear and saves fuel. However, not all smart thermostats support OpenTherm equally, and this is where the main brands differ significantly. While data from Hive shows a 6% average reduction in gas consumption even with basic relay control, a modulating system can achieve even greater savings, especially in well-insulated homes.
The choice depends heavily on your property’s age and your technical comfort level. The following table breaks down the key differences, providing a clear guide based on information from market analysis and manufacturer specifications.
| Thermostat Brand | OpenTherm Modulation Support | Best Suited For | UK Installer Network | Typical Price Range |
|---|---|---|---|---|
| Tado | Yes – Full modulating control for flame size adjustment | Modern homes (post-2000) with correctly sized radiators, Worcester Bosch & Vaillant combi boilers | Independent installers, DIY-friendly | £200-£250 (starter kit) |
| Nest Learning (Gen 3) | Limited – Heat Link supports basic OpenTherm but primarily Relay on/off | Mid-age properties (1990s-2010s), tech-savvy DIY users | Independent installers, strong DIY community | £220-£250 |
| Hive Active Heating | No – Relay control only (on/off) | Older UK properties (Victorian/Edwardian) with oversized cast-iron radiators, non-technical users | Direct British Gas engineer network (extensive UK coverage) | £180-£220 (often bundled with installation) |
For a homeowner with a modern combi boiler seeking maximum efficiency, a Tado system is often the superior choice due to its full OpenTherm support. For those in older homes with less responsive heating systems or who prefer the backing of a large installer network like British Gas, Hive’s simpler on/off control is a robust and user-friendly option.
The TRV Override Mistake That Wastes Heat in 40% of UK Smart-Thermostat Homes
One of the most significant and widespread sources of inefficiency in UK homes with smart heating is a phenomenon we can call « system conflict. » This occurs when your smart thermostat is unknowingly fighting a battle against the Thermostatic Radiator Valves (TRVs) on your radiators. A TRV is the numbered dial on your radiator that senses the temperature of the room it’s in and adjusts the flow of hot water to that specific radiator. The conflict arises when the TRV in the same room as your main smart thermostat is set too low.
Imagine your smart thermostat is in the living room, set to 21°C. However, the TRV on the living room radiator is set to ‘3’ (around 19°C). The thermostat senses the room is cold and tells the boiler to send hot water. But the TRV, sensing the room is already at its own 19°C limit, closes the valve and stops hot water from entering the radiator. The thermostat keeps demanding heat, the boiler keeps running, but the primary radiator in the room never gets hot. The boiler cycles inefficiently, wasting gas trying to achieve a temperature that the local TRV is actively preventing.
This simple configuration error is incredibly common yet easily fixed. The rule is simple: the TRV in the room with the main thermostat must not be the limiting factor. It should be fully open to allow the smart thermostat to have complete control. The TRVs in other rooms can then be used to create basic « zones, » setting bedrooms or unused offices to a lower temperature. For true room-by-room control, an upgrade to smart TRVs is necessary, which can cost between £40-£60 per radiator for models from Tado or Hive, but correcting the basic conflict costs nothing.
Your Action Plan: No-Cost TRV Configuration for Smart Thermostat Rooms
- Identify the room that contains your main smart thermostat (this is usually the living room or hallway).
- Locate the TRV (the dial on the radiator pipe) on the radiator within that same room.
- Turn this specific TRV to its maximum setting, typically marked with a ‘5’ or a star symbol (*), to ensure it never restricts heat flow.
- Set TRVs in less-used rooms, like spare bedrooms or an unoccupied home office, to a lower setting like ‘2’ or ‘2.5’ to limit heat without turning it off completely.
- Never set any TRV to ‘0’ or the ‘off’ position while your heating system is running, as this can cause the boiler to over-pressure. Use setting ‘1’ for basic frost protection.
When Is the Best Month to Install a Learning Thermostat Before UK Winter?
Timing the installation of your learning thermostat is a strategic decision that is often overlooked. Most homeowners wait for the first cold day of autumn to think about their heating, but by then, you’ve missed the optimal window. The best time to install a learning thermostat in the UK is in late summer or early autumn, ideally September. This gives the device a crucial « training period » during mild weather.
A learning thermostat’s primary job is to understand your home’s unique thermal properties. It needs to learn how quickly your home heats up and, more importantly, how quickly it loses heat—its « thermal decay » or thermal inertia. It learns this by observing the temperature changes over several days and weeks. Installing it in September, when the heating is only needed intermittently, allows it to build this model with low stakes. It can run short heating cycles and measure the results without the pressure of battling a freezing cold snap.

By the time the first serious frost arrives in late October or November, a thermostat installed in September will have already created a sophisticated heating model of your home. It will know precisely how early it needs to start heating to reach your desired 21°C by 7 am. A thermostat installed in the middle of a cold spell has no historical data and operates inefficiently, often overshooting temperatures and wasting gas while it scrambles to learn. As experts from the Energy Saving Trust advise, this preparatory phase is key.
Installing in September allows the thermostat to learn the home’s unique thermal decay properties during mild weather with low stakes, ensuring it’s fully optimized before the first major cold snap in late October/November.
– Energy Saving Trust, UK heating efficiency guidance
Loft Conversion or Garage Conversion: Which Adds More Per-Square-Metre Value in the South East?
While the financial value added by a loft or garage conversion is a complex topic influenced by ceiling prices and local demand in the South East, there’s a critical heating consideration that directly impacts your energy bills and links back to your smart thermostat. Modern conversions, whether in the loft or garage, are subject to stringent UK Building Regulations (Part L) concerning energy efficiency. This means they are required to be highly insulated, often making them the most thermally efficient room in the entire house.
This creates an imbalance. The new, well-insulated loft room might retain heat for hours, while the original draughty Victorian living room below loses it in 30 minutes. If your entire house is controlled by a single smart thermostat located in the old part of the house, you will end up massively overheating the new conversion. The thermostat will keep the boiler running to warm the colder living room, while the loft becomes uncomfortably hot, wasting a significant amount of energy.
To prevent this, UK Building Regulations guidance implicitly points towards the need for separate heating zones. The most cost-effective way to achieve this is by integrating smart TRVs into your system. By placing a smart TRV on the radiator in the new conversion, you can set it to its own schedule and temperature, independent of the main thermostat. This allows you to heat the new room only when it’s occupied, without having to turn on the heating for the entire house. It transforms a single-zone system into a multi-zone system, ensuring the superior insulation of your new conversion translates into real energy savings, not just wasted heat.
How to Choose a Smart Meter Display That Talks to Your Home Automation System?
For the technically inclined homeowner, the ultimate step in smart heating is to bypass supplier apps and integrate real-time energy data directly into a home automation platform like Home Assistant. This allows for incredibly sophisticated rules, such as automatically turning down the heating when the live cost per kWh exceeds a certain threshold. However, the standard In-Home Display (IHD) provided by your energy supplier is a closed box; it displays data but doesn’t share it. The solution lies in a piece of hardware called a Consumer Access Device (CAD).
A CAD is a small, third-party device that you authorise to connect to your smart meter’s secure local network (the Home Area Network, or HAN). It then reads the data directly from your meter—bypassing the data latency of supplier systems, which often only collect data once every 24 hours. The CAD can provide electricity data every 10 seconds and gas data every 30 minutes, giving you a true, near real-time feed.
Brands like Hildebrand with their Glow IHD and CAD offer a clear pathway for this. The device connects to your meter and then sends the data to your local network using protocols like MQTT, which home automation systems can easily interpret. This raw data feed is the holy grail for energy management, allowing you to build a dashboard that correlates gas usage directly with boiler firing times, outdoor temperature, and cost. Here is the typical process for setting one up:
- Obtain your IHD’s unique identifier (GUID/MAC address), usually found on a sticker on the back of the device.
- Purchase a compatible CAD, such as the Hildebrand Glow, which is designed to work with the UK’s smart meter network.
- Register the CAD with your smart meter using your GUID via the manufacturer’s app and wait for the Data Communications Company (DCC) to verify and authorise the connection.
- Configure the CAD to output data via a local API or the MQTT protocol to your home automation platform.
- Create automations and dashboards to visualise and act upon the near real-time data, enabling true tariff-aware heating control.
Key Takeaways
- System Conflict is a Major Issue: Your smart thermostat is likely fighting your radiator valves (TRVs). Ensure the TRV in the same room as the thermostat is fully open.
- Timing is Everything: Install your thermostat in September to allow it to learn your home’s thermal properties during mild weather, making it fully effective for winter.
- Control is More Than a Schedule: True smart control means using agile tariffs to heat when energy is cheap (tariff-aware heating) and zoning your home with smart TRVs.
How to Hide Smart Home Tech So Your Living Room Looks Like a Home, Not a Showroom?
After optimising every technical aspect of your smart heating system, the final challenge is an aesthetic one: how to make this technology blend seamlessly into your home’s decor. A sleek, circular thermostat or a bulky white TRV can easily disrupt the carefully curated style of a living room, making it feel more like a tech showroom than a comfortable home. The goal is aesthetic integration, where technology serves its function without visually dominating the space.
This doesn’t have to involve complex custom cabinetry or chasing wires into walls. Often, clever placement and simple cosmetic upgrades are all that’s needed. The principle is to either camouflage the device or elevate it to the status of a deliberate decorative object. For instance, instead of placing a thermostat in the centre of a blank wall where it will draw the eye, positioning it within a gallery wall of photos and art can make it read as just another framed element.
Similarly, the standard white plastic hardware can often be upgraded. Many UK suppliers now offer designer TRV heads in finishes like brushed nickel or matte black that can complement period-style radiators. For the thermostat itself, a growing market of third-party sellers on platforms like Etsy offers custom backplates in materials like walnut, oak, or brass, transforming the device from a piece of plastic into a stylish accent. Here are several practical solutions for integrating your smart tech:
- The Gallery Wall Method: Install the thermostat as part of a collection of framed art, using its circular or rectangular shape as a component of the overall composition.
- Custom Backplates: Enhance the thermostat with a 3D-printed or wooden backplate that matches your interior finishes, turning it into a decorative feature.
- Discreet Wiring: Use small, paintable mini-trunking to conceal wires, running them along skirting boards or door frames rather than across open walls.
- Aesthetic TRV Upgrades: Replace standard white plastic TRV heads with stylish models in metallic or matte finishes that match your radiator and other fixtures.
- Boiler Receiver Concealment: Install the wireless receiver box inside a ventilated utility cupboard or behind a service panel to keep it out of sight.
By taking a holistic view—from technical configuration to aesthetic integration—you can finally create a heating system that is not only intelligent and economical but also a seamless part of your home. The next logical step is to audit your own home against these points and begin the training process.