In summary:
- Your biggest enemy isn’t your speakers, but network congestion from your neighbours, especially during evening peaks.
- Solving boomy bass from a subwoofer requires a specific placement technique called the « Subwoofer Crawl, » not just pushing it into a corner.
- For complex rooms like L-shapes or multi-use spaces, think in « acoustic zones » rather than trying to cover the whole area with one source.
- Installing in-ceiling speakers during a UK loft conversion legally requires fire hoods to maintain structural safety and comply with regulations.
You’ve curated the perfect playlist. Guests are arriving, drinks are flowing, and you hit ‘play’. The music fills the lounge, but in the kitchen, it’s a half-second behind, creating a disorienting echo. Or worse, it cuts out entirely just as the chorus hits. This is the frustrating reality for many homeowners trying to create a seamless whole-home audio experience. The dream of a perfectly synchronised soundtrack for a party quickly dissolves into a battle with Wi-Fi dropouts and that maddening, fun-killing audio latency.
Most advice points towards buying a new router or simply spending more on a premium speaker system. But as an installer, I can tell you the problem is rarely that simple. The real culprits are often hidden in the environment of your UK home: the thick walls of a period property, the Wi-Fi « traffic jams » in a dense terraced street, or the unique acoustic challenges of a modern open-plan extension. You can have the best gear in the world, but if you don’t understand the physics of your space, you’ll never achieve that flawless, delay-free sound.
Forget just buying more boxes. The key is to think like an installer—to diagnose the root cause before applying a solution. This guide moves beyond generic tips to give you the trade secrets for tackling the most common multi-room audio issues. We’ll explore why your network fails at 8 PM, how to correctly position speakers in awkward rooms, and how to make smart purchasing decisions that deliver both quality and value. We will show you how to master the environment to ensure your music is perfectly in sync, every time.
This article breaks down the essential strategies for achieving flawless multi-room audio, from diagnosing network issues to optimising speaker placement in challenging UK homes. The following sections will provide a clear roadmap to creating the perfect, synchronised sound system for your space.
Summary: How to Stream the Same Music to Every Room Without Noticeable Delay?
- Why Does Your Wi-Fi Speaker System Drop Out During Peak Evening Hours?
- How to Add a Kitchen Speaker to Your Existing Sonos System Without Starting Over?
- Soundbar or Stereo Separates: Which Delivers Better Audio in a 25 m² UK Lounge?
- The Subwoofer Corner Mistake That Creates Boomy Bass in UK New-Builds
- When Do UK Electronics Retailers Discount Multi-Room Audio by Up to 30%?
- How to Layer Lighting in One Room That Serves as Lounge, Office and Dining Area?
- How to Position Ceiling Speakers in an L-Shaped UK Living Room for Even Coverage?
- How to Install In-Ceiling Speakers During a UK Loft Conversion Without Structural Issues?
Why Does Your Wi-Fi Speaker System Drop Out During Peak Evening Hours?
That frustrating moment when your music stutters or stops, usually between 7 PM and 10 PM, isn’t a fault with your speaker. It’s a symptom of network congestion. Think of your Wi-Fi like a motorway. During the day, traffic is light. But in the evening, everyone in your neighbourhood gets home and starts streaming Netflix, gaming online, and video calling. Your music is now stuck in a digital traffic jam, especially on the crowded 2.4GHz frequency band, which is common in many UK homes. This band has fewer lanes (channels) and is also used by microwaves, baby monitors, and cordless phones, creating even more interference.
The solution is to find a clearer lane. Most modern routers are « dual-band, » offering both a 2.4GHz and a 5GHz network. The 5GHz band has more channels and is generally less congested, making it far more reliable for streaming high-quality audio. While it has a slightly shorter range than 2.4GHz, it’s the preferred choice for any media streaming. Switching your speakers to this band can often solve dropout issues instantly. This is particularly effective in terraced or semi-detached houses where you’re competing with a dozen other networks right next door.
To diagnose the problem properly, you need to become a traffic warden for your own network. You can use a free Wi-Fi analyser app on your phone or computer to see which channels are busiest. The goal is to manually set your router to use the least crowded channel available. Furthermore, ensure there’s physical space around your gear; placing speakers or routers less than 18 inches from other electronics can cause electromagnetic interference that disrupts the signal, regardless of how clear the channel is. An analysis by UK network specialists confirms that the 2.4GHz frequency band experiences significant congestion in densely populated areas, making a strategic switch to 5GHz a primary troubleshooting step.
By actively managing your Wi-Fi environment instead of just hoping for the best, you can create a robust foundation for your multi-room audio system, ensuring the music plays on, even during digital rush hour.
How to Add a Kitchen Speaker to Your Existing Sonos System Without Starting Over?
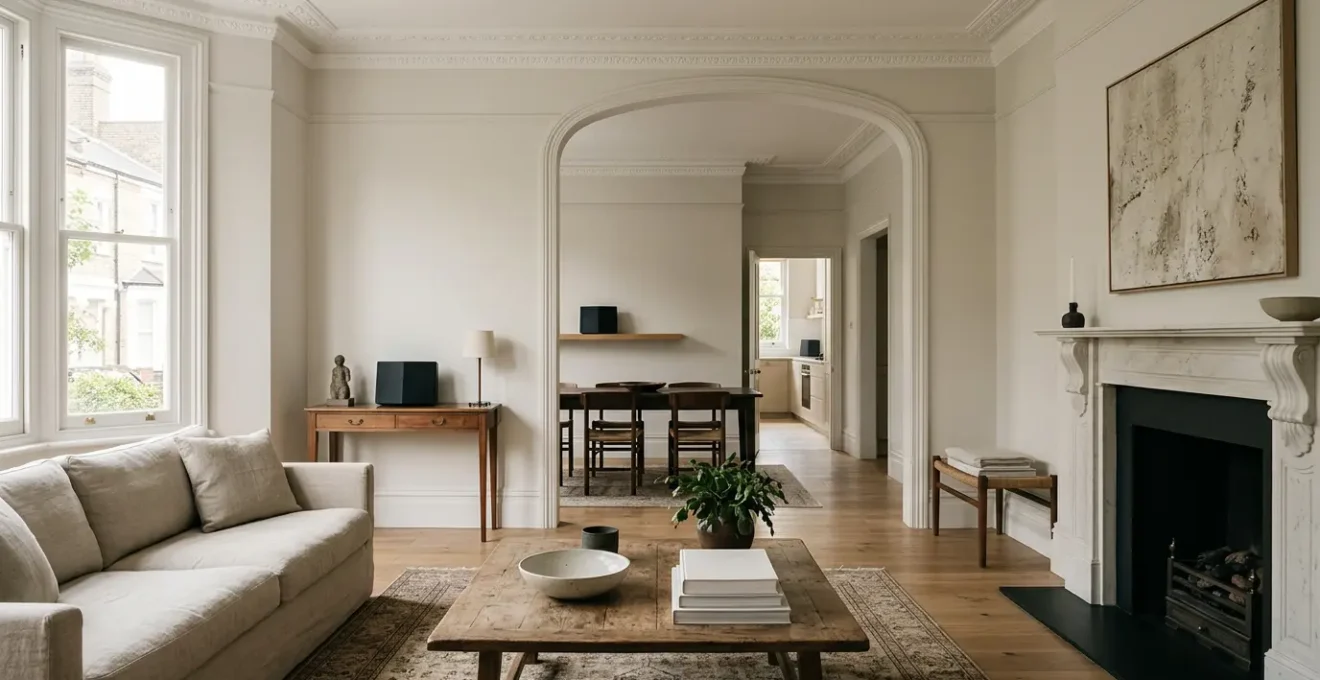
The beauty of modern multi-room systems like Sonos is their modularity. You don’t need to plan a whole-house installation from day one. Integrating a new speaker into your kitchen, for example, is a straightforward process designed to expand your system, not replace it. The key is to select the right speaker for the environment and position it for optimal sound, rather than just placing it on the nearest available surface. The kitchen is a challenging acoustic space, with hard, reflective surfaces like granite worktops and tiled floors that can make music sound harsh.
For most kitchens, a standalone smart speaker like a Sonos Era 100 or Five is an excellent choice. They are humidity-resistant and their built-in tuning software (like Sonos Trueplay) can analyse the room’s acoustics and adjust the EQ to compensate for those reflective surfaces. This means you get balanced, clear audio whether you’re cooking by the hob or sitting at the breakfast bar. The setup is simple: you plug it in, open the app, and follow the prompts to add a new « room » to your existing system. It will automatically sync with your other speakers, eliminating any audio latency.
The placement is just as important as the speaker itself. Avoid tucking it away in a corner where bass can become boomy. Instead, place it on a worktop or an open shelf, ideally at ear level, directed towards the main listening and activity areas. This ensures the sound is projected clearly into the space. A real-world example demonstrates this principle perfectly.
Case Study: Smart Integration in a UK Kitchen-Diner
A UK homeowner successfully integrated Sonos Era 300 speakers into a 6.7m x 5.0m kitchen-dining area with 3.1m ceilings. Instead of a complex ceiling installation, they placed one speaker on a shelf in the kitchen zone and another on a stand in the dining area. This strategic « zoning » provided excellent, even sound coverage across the entire open-plan space, proving that a thoughtful, simple setup can be more effective than an expensive, complicated one.
Kitchens benefit from counter-mounted speakers directed toward cooking and gathering spaces.
– Smart Home Wizards, Sonos System Setup: Creating Multi-Room Audio Bliss at Home
Soundbar or Stereo Separates: Which Delivers Better Audio in a 25 m² UK Lounge?
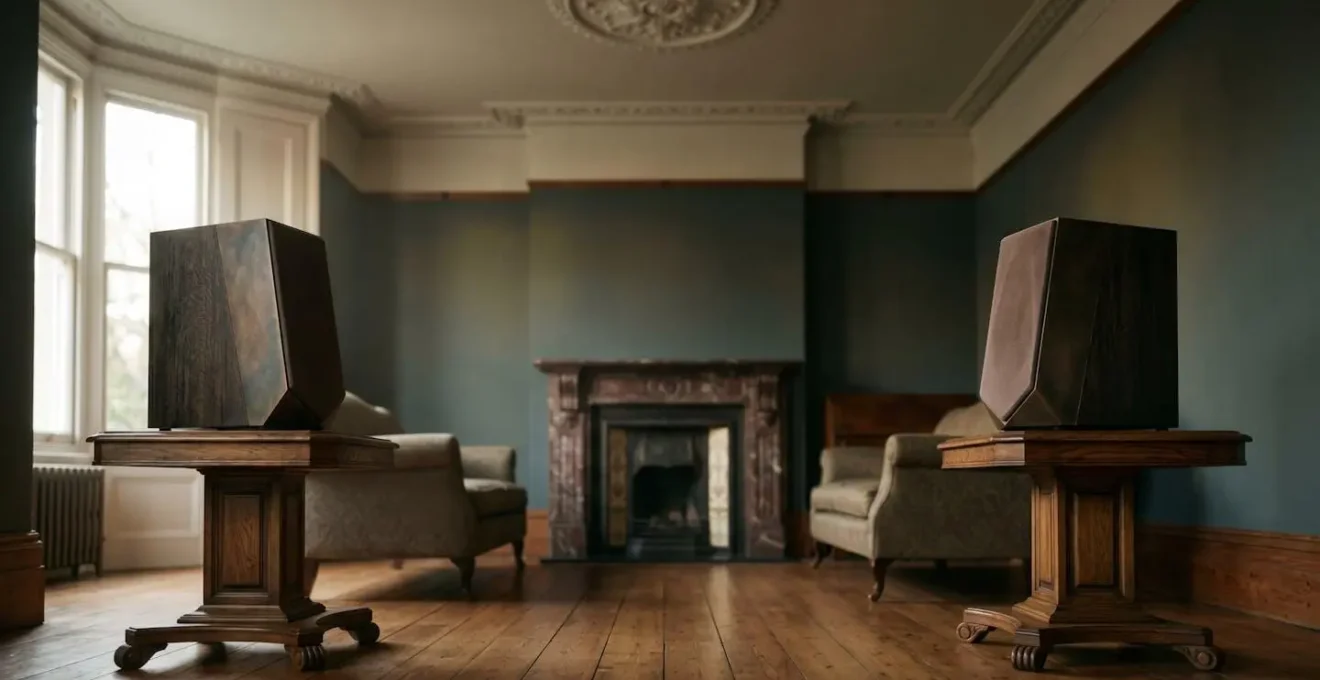
For a typical UK lounge of around 25 square metres, choosing the heart of your audio system often comes down to a choice between a sleek soundbar and a traditional pair of stereo speakers (separates). It’s a classic battle between convenience and outright audio quality. A soundbar system is the champion of simplicity. It’s a single unit that sits under your TV, often with a wireless subwoofer, and connects with just one cable. For movie nights and casual TV watching, a good soundbar provides a massive upgrade over your TV’s built-in speakers, and many offer multi-room capabilities to link with other speakers in your home.
However, if music is your priority, stereo separates will always win. The physical separation between two dedicated speakers creates a wide, immersive soundstage that a single soundbar enclosure simply cannot replicate. You hear distinct placement of instruments, creating a more engaging and three-dimensional listening experience, as if the band is in the room with you. While the initial cost and setup are more involved—requiring an AV receiver and speaker cable—the potential for audio fidelity is significantly higher. It’s a modular system you can upgrade over time, swapping out speakers or adding new components without replacing everything.
This table breaks down the key considerations for a 25m² lounge, based on data from tech advisors.
| Feature | Soundbar System | Stereo Separates |
|---|---|---|
| Initial Cost | £220-£300 (with sub) | £500+ (speakers + receiver) |
| Setup Complexity | Single cable to TV, ready in minutes | Multiple speakers to wire, requires AV receiver setup |
| Audio Quality | Good for casual listening, virtual surround | Superior stereo imaging, wider soundstage, better for music |
| Upgradability | Limited; often requires full replacement | Highly modular; add components over time |
| Space Requirements | Minimal; single bar under TV | Requires placement of 2+ speakers with optimal spacing |
| Neighbour Consideration | Powerful subwoofer can transmit through walls | Better bass control, less wall transmission |
This visual below helps to conceptualise how the physical separation of stereo speakers creates a broader and more defined field of sound compared to a single-point source like a soundbar, which is crucial for authentic music reproduction.
Ultimately, the decision rests on your priority. For a clean, simple setup that dramatically improves TV sound and plays music well, a soundbar is a great choice. But for the homeowner hosting a party who wants the music to be an experience in itself, the superior stereo imaging of separates is unbeatable. An analysis from audio-visual experts provides further detail on this trade-off between convenience and performance.
There’s no single right answer, but by understanding the fundamental trade-offs, you can choose the system that will bring the most joy to your specific lounge.
The Subwoofer Corner Mistake That Creates Boomy Bass in UK New-Builds
You’ve invested in a great sound system with a powerful subwoofer, but instead of tight, punchy bass, you get a muddy, overwhelming drone that rattles the windows. This is an incredibly common problem, especially in modern UK new-builds with plasterboard walls that vibrate easily. The culprit is almost always placement. The most common mistake is shoving the subwoofer into a corner. While this seems logical, corners act as acoustic amplifiers, creating a « standing wave » where bass frequencies build up and become boomy, indistinct, and overpowering.
The bass you hear is a combination of the direct sound from the subwoofer and the sound reflected off your room’s walls, floor, and ceiling. In a corner, these reflections converge and reinforce each other unevenly, creating « hot spots » where the bass is boomy and « nulls » where it disappears completely. The goal is to find a position that delivers the smoothest, most consistent bass response at your main listening position—your sofa. And for that, installers use a simple but brilliantly effective technique known as the « Subwoofer Crawl. »
It might sound strange, but it works every time and costs nothing. Instead of guessing, you are using your own ears to find the scientifically optimal spot in your unique room. It takes about 15 minutes and will fundamentally transform your system’s low-end performance from a boomy mess to a tight, musical foundation. For those in terraced or semi-detached homes, this process has the added benefit of helping you find a location that minimises bass transmission through party walls, keeping your neighbours happy.
Your Action Plan: The Subwoofer Crawl Method
- Place Subwoofer in Your Seat: Temporarily move your subwoofer and place it directly on the cushion of your main listening position (your favourite spot on the sofa).
- Play a Bass-Heavy Track: Choose a song with a repetitive, consistent bass line. This will be your test signal.
- Get on All Fours: This is the « crawl » part. Get down on the floor and slowly crawl around the perimeter of your room where you might potentially place the sub.
- Listen for the Sweet Spot: As you move, listen carefully. You’ll hear the bass change dramatically. Mark the spots on the floor (with tape or a book) where the bass sounds tightest, clearest, and most defined.
- Test and Finalise: Move the subwoofer to the best-sounding spot you marked, return to your sofa, and listen again. This position will give you the most balanced bass at your primary seat.
By letting the room tell you where the subwoofer should go, you replace guesswork with precision and ensure the bass serves the music, rather than overwhelming it.
When Do UK Electronics Retailers Discount Multi-Room Audio by Up to 30%?
Building a high-quality multi-room audio system can be a significant investment, but timing your purchases strategically can lead to substantial savings, often up to 30% or more. UK electronics retailers operate on a predictable annual sales calendar, and knowing when to shop is just as important as knowing what to buy. The most significant discounts are consistently found during major retail events where competition is fierce.
Black Friday in late November is the undisputed champion for tech deals. Retailers like Currys, John Lewis, and specialist stores such as Richer Sounds offer their deepest price cuts of the year across brands like Sonos, Bluesound, and Denon. The Boxing Day and January Sales that follow are also prime time for bargains, as retailers clear out stock to make way for new models. Beyond the big two, keep an eye on bank holiday weekends, particularly Easter, when spring promotions often target home entertainment upgrades. A less obvious but equally valuable time to shop is from August to September. This is when many audio brands announce their new product lines, and retailers are keen to clear out the « old » (but still excellent) models at a discount.
To maximise your savings, it pays to be prepared. Create a wishlist of the components you need and track their prices in the weeks leading up to a sale period. This helps you recognise a genuine deal from inflated « sale » prices. Also, don’t underestimate the power of specialist Hi-Fi retailers. Many people assume big-box stores have the best prices, but a look at consumer electronics specialists reveals that retailers like Richer Sounds and Sevenoaks offer price-matching guarantees against online competitors, often coupled with longer warranties and expert advice. Signing up for the newsletters of these specialist stores can also give you early access to their VIP sales events, which often precede the public discounts.
A little patience and planning can free up a significant portion of your budget, allowing you to invest in a better speaker or add another room to your system without breaking the bank.
How to Layer Lighting in One Room That Serves as Lounge, Office and Dining Area?
While this question is about lighting, the principle of « layering » is a perfect analogy for creating sophisticated audio in a multi-functional room. Just as you wouldn’t use a single, harsh overhead light for every activity, you shouldn’t rely on one audio setup to serve the different moods of a lounge, office, and dining space. The goal is to create distinct « acoustic zones » that match the function of each area, giving you flexibility and control over the atmosphere.
Think of it in three layers. The first is your « ambient » layer, for general background listening or during dinner. This could be a pair of discreet, wall-mounted speakers or a single smart speaker placed out of the way, providing a pleasant, non-intrusive soundfield that fills the space without demanding attention. It’s the audio equivalent of soft, diffused lighting. It sets a mood without being the main focus.
The second layer is your « task » audio. This is for your office zone. Here, you need clear, focused sound for video calls or for concentration while working. A small pair of desktop speakers or even a high-quality pair of headphones provides this focused audio without disturbing the rest of the open-plan space. It’s the equivalent of a desk lamp, illuminating only the area where you need it.
Finally, there’s the « feature » layer for the lounge area. This is your main event system—the stereo separates or soundbar we discussed earlier—designed for immersive movie nights or critical music listening when you want to be fully engaged. This is your audio chandelier; it’s the centrepiece that delivers maximum impact. By using a multi-room audio platform, you can choose to play music on any one of these layers individually, or group them all together for a full « party mode » that fills the entire space with synchronised sound.
By layering your audio just as you would layer your lighting, you transform a single, compromised space into a versatile environment where the sound always perfectly matches the occasion.
How to Position Ceiling Speakers in an L-Shaped UK Living Room for Even Coverage?
An L-shaped room, common in UK homes with extensions, presents a significant challenge for audio. Treating it as a single, large rectangle and placing speakers accordingly will inevitably result in poor coverage, with some areas being too loud and others having virtually no sound at all. The installer’s secret to solving this is to stop thinking of it as one room. Instead, you must divide it into two distinct acoustic zones: the main « leg » of the L and the smaller « leg. »
Each zone should be treated as its own separate rectangular room. For the larger zone, you would typically install a stereo pair of in-ceiling speakers, positioned for even coverage within that specific area. They should be placed equidistant from the side walls of that zone and roughly one-third of the way into the room from the end walls. This creates a balanced stereo image for the primary seating area within that larger space.
For the smaller zone (for example, a dining area or reading nook), you have two main options. The first is to install a second, separate stereo pair of speakers dedicated to that zone. This gives you maximum control, allowing you to play different volumes in each zone or even different music if your system supports it. The more common and cost-effective solution is to install a single « stereo input » ceiling speaker. This special type of speaker has two tweeters and accepts both the left and right channel inputs, providing a combined stereo sound from a single point. It’s the perfect solution for filling a smaller zone with balanced audio without the expense and complexity of installing two separate speakers.
The image below illustrates this zoning strategy, showing how an L-shaped space can be logically divided to ensure complete and balanced audio coverage throughout.
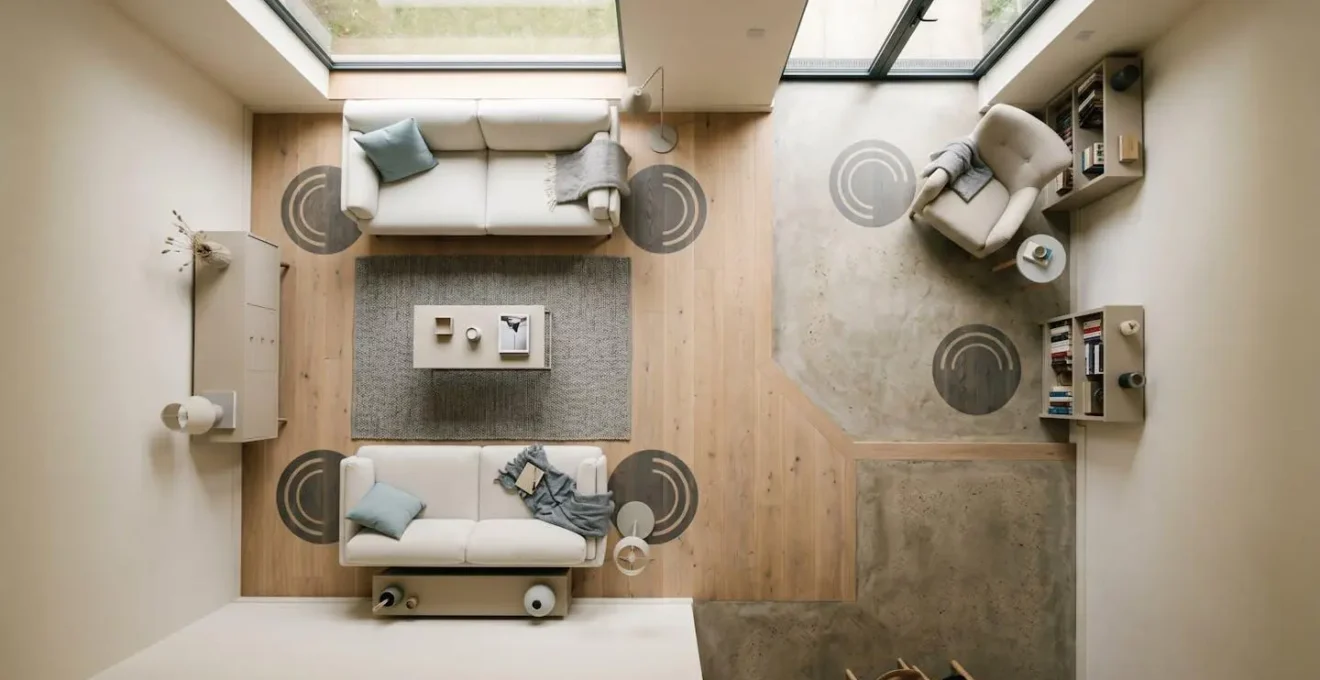
By wiring both zones back to the same amplifier or system, you can choose to play music in one zone, the other, or both together, perfectly synchronised. This zoning approach turns an acoustically awkward space into a flexible, high-performance audio environment.
It’s a method that requires a little more planning upfront but delivers a vastly superior result, ensuring there are no dead spots in your sound.
Key Takeaways
- Perfect multi-room audio is less about brand and more about diagnosing your home’s unique acoustic and Wi-Fi environment.
- Solving audio dropouts often involves switching to the less-congested 5GHz Wi-Fi band and strategically placing equipment away from other electronics.
- For superior music quality, a pair of stereo separates will always outperform a soundbar by creating a genuine, wide soundstage.
How to Install In-Ceiling Speakers During a UK Loft Conversion Without Structural Issues?
A loft conversion is the perfect opportunity to install discreet, high-quality in-ceiling speakers for a clean, minimalist audio setup. However, cutting holes in your new ceiling is not something to be taken lightly. Doing it incorrectly can compromise not only sound quality but, more importantly, the fire safety and structural integrity of your home. In the UK, this is governed by strict building regulations that cannot be ignored.
When you cut a hole in a ceiling, you break its fire-resistant barrier. In the event of a fire, this opening can allow flames and smoke to spread rapidly to the floor above. To prevent this, it is a legal requirement to fit a fire hood over the back of every in-ceiling speaker. These intumescent hoods are designed to expand when exposed to heat, sealing the opening and maintaining the ceiling’s original fire rating (typically 30 or 60 minutes). An installation without these hoods will fail a building inspection and could have serious insurance implications.
Beyond fire safety, you must also consider acoustic and thermal integrity. The space above the ceiling (the void) needs to be handled correctly. You cannot simply surround the speaker with standard loft insulation, as this can cause the speaker to overheat and is a fire hazard. Instead, you must use an appropriate fire hood which also serves as a protective enclosure. For sound quality, using a speaker with an integrated back-box will provide a sealed enclosure, ensuring consistent bass response and preventing sound from leaking into the room above. This is crucial for bedrooms or offices located above the loft space. The entire installation must be compliant, as mandated by Part B of UK Building Regulations, which specifies the need for maintaining fire integrity.
This close-up detail shows the critical components of a compliant installation, including the protective fire-rated hood that is essential for safety and regulatory approval.

By planning for these requirements from the start, you ensure your integrated audio system is not only sonically superb but also completely safe and compliant, giving you true peace of mind.